The Moment of Truth
You've just finished your new project. Before you apply power, here are a few tips to keep the smoke in.
So a curl of smoke is rising from the last solder joint in your new project, and after months of planning, designing, ordering and building (or perhaps just putting a kit together), you're finally ready to power it up. Should you just hook it up to a battery or the mains and throw the switch? Whoa there, Turbo! 1 They call this "the smoke test" for a reason, but you can minimize your chances of setting off the smoke detector (and losing your street cred) by taking it slow and remembering a few simple tips. Most of these tips are geared towards PCBs (Printed Circuit Boards), but many of them can be applied to breadboarded circuits as well. Let's heat 'em up!
First, take a break (or at least a breath). A reboot can help you see problems you may have missed before. Then, visually check your work. Do unpopulated footprints suggest a missing component? Are any parts left over? (Protip: counting out only the needed parts beforehand can help eliminate leftovers. An old Heathkit technique (get off my lawn!) is to use an egg carton to keep everything organized.) This is also a good time to double-check part values. Are the right resistors in the right places? Are your polarized capacitors, diodes, and LEDs installed in the correct direction? You'd be surprised how often this happens, even to us "professional" 2 engineers.
While you're scrutinizing your work, look for solder bridges, especially between the pins of fine-pitch SMD chips (but note that adjacent ground pins will often bridge to each other; it may look alarming, but isn't a problem.) Finding and fixing solder bridges now, before they blow something up, can save you from having to order new parts. (As much as we love you as a customer, we love your success even more.)
While you're at it, keep an eye out for solder balls (which is also a good curse to use around the lab). These form when flux boils underneath liquid solder, causing it to spatter. They have a nasty habit of getting lodged between IC pins, causing intermittent and hard to diagnose problems later.
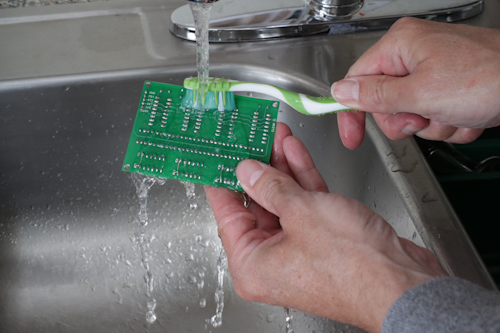
I know it delays gratification, but something I like to do at this point is to clean the flux off the board. If your board doesn't contain any moisture-sensitive components (barometric and humidity sensors come to mind), and you've been using water-soluble flux (other types of flux require alcohol or other solvents), then take an old toothbrush, a drop of detergent, and give the board a quick scrub under some warm water. Give all the solder joints and surrounding surfaces a good brushing, and rinse well afterwards. (Protip: when you're done, don't leave your board-cleaning toothbrush by the bathroom sink.)
You won't want to do anything further until the board is absolutely dry. I'm never patient enough to let it air-dry, so I'll use a heat gun (on low) or even a hair dryer on the board until all the visible water has evaporated, and then give it an extra minute to make sure all the hidden water is gone. Technically you don't have to clean most types of flux off your boards. Most circuitry will work fine with the flux left in place. However I've seen this step miraculously fix malfunctioning boards by getting rid of hard-to-see solder balls, and removing the flux can make sensitive analog circuitry work better. Plus, cleaning your board makes it look spectacular.
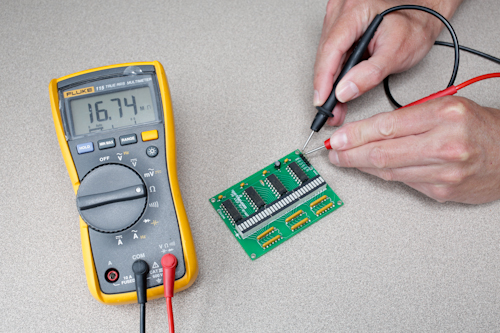
Now are we ready to apply power? Not yet. Repeat after me: when in doubt, ohm it out. Before applying power, use a multimeter to measure the resistance (not continuity) across the power input to your board. Hopefully you'll see above 10k and even above 1M ohms of resistance. That much resistance means there aren't any shorts upstream of your regulator (if you have one), which is a good thing. (It's OK if the resistance is changing, this is from the multimeter weakly charging the capacitors in your circuit.) If your circuit has any voltage regulators in it, this is also a good test to run downstream of them. Check the resistance between each regulator's output and ground; you should see a high resistance as described above.
If you ever see only a few ohms, that's a short, which is trouble waiting to happen (but won't because you caught it in time!). Shorts are most often caused by solder bridges, but they can also be caused by putting a part in the wrong place. Carefully check your circuit, comparing it to the schematic. When you've found and fixed the short, check the resistance again to verify that you're no longer in the danger zone.
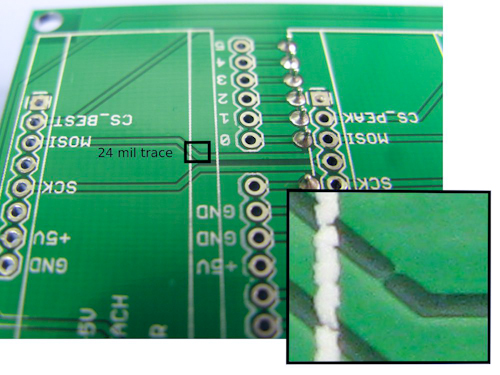
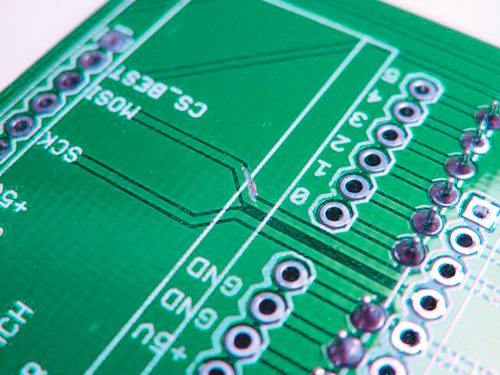
Occasionally you'll reach a point where everything looks correct, but the short stubbornly remains. Before throwing your board out the window (not recommended for orbital or underground lairs), remember that the fault could be from a bad part, or it could be on the PCB itself. It's rare for a part to "fail shorted" (more often they'll "fail open"), but it can happen, especially with MOSFETs. And they're rare, but we do see PCB errors from time to time.
Both of these problems can be very hard to track down. The trick is to divide and conquer. Be ready to cut traces (you can repair them later) and remove parts to zero in on the problem. PCB errors will almost always be a hairline copper bridge from a trace to the surrounding ground pour. Once you find it (a bright light and magnifier will help), breathe a sigh of relief, curse your boardhouse, and use a hobby knife to cut the offending whisker.
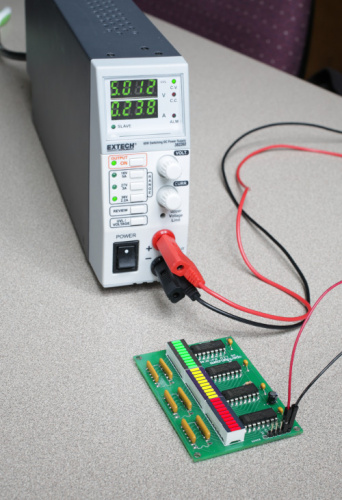
We're almost there! If you have one, this is an excellent time to use a benchtop power supply with current limiting. Before connecting the power supply to your circuit, set the supply's voltage to what your circuit requires, and set the current to be a bit more than what you're expecting your circuit to draw. This way, if your circuit does decide to draw a bunch of current if left to its own devices (ha!), the power supply will drop the voltage to keep the current at the value you set, often while turning on a helpful red LED.
It's finally time for the smoke test! Connect your circuit to the power supply, turn on the supply's output, and see what happens. Because of all the steps you performed above, this should be pleasantly uneventful. Hopefully your circuit powered up correctly, and your power supply didn't complain. You may now do the Snoopy dance if you wish.
If your circuit isn't working the way you expected it to, do some spot checks with your meter while it's powered to make sure the right voltages are where you expect them to be. You might also want to remove power and start checking for the opposite of shorts; open circuits, AKA things that should be connected but aren't. This time, set your meter to continuity, and start working your way through the schematic, verifying all the connections. (A paper schematic is helpful here, as you can cross off the nets as you check them.) If you don't hear the "beep", you'll know something's... asleep? (We'll work on that.)
Now that your circuit is (hopefully) up and running, you can test the functionality. This is where you'll start putting code on a microcontroller (we've all forgotten this step once... or twice), and/or attaching inputs to your circuit and verifying that the outputs are what you expect them to be. A good tip here is to start simple, and work your way up to full functionality. If something's not working, figure out why, and hack it until it's right. Congratulations! You did it!
One last thing. Even as you're basking in the well-deserved glow of your achievement, you probably noticed some design problems or other areas that could be improved upon. This is a great time to write down lessons learned; things that you can review before your next design that will help make your projects better and better.
All of us (except Pete) started out knowing nothing. The way we get good at this stuff is pressing forward, making mistakes, remembering not to make those particular mistakes again, and making all-new mistakes next time. There was a point to this story, but I seem to have forgotten it.
We hope this has been helpful! If you have any tips or rituals you use when powering up your projects for the first time, let us know in the comments. Also, if you have a better name for this series than "Engineer Thursday", let us know. Please.
1. You can thank Dave for this classic SparkFun 404 message.
2. A special effects artist named Greg Jein once said that it was personally important to him to always remain an amateur, since the label "professional" can imply that you are done learning. Amateurs are willing to try new things because they haven't been told that's not the way it's done; this idea is at the core of the maker movement, and something we embrace at SparkFun.
