Enginursday: Would you like to play a game?
Fence-a-Mole: A real-world "fencing training" game made using XBee and the ADXL345
I'm a big fan of weird games. A lot of the projects I've done for SparkFun involve play: the Quad Buddy Ball Balancer (which never did get a proper blog post), the FreeStick, the Hot Seat and the Pi Retrocade Cabinet.
For this week's Enginursday project, I wanted to make a fun game that involves some real movement. A friend mentioned a project she had been asked to think about that sounded so fun I had to make it. Thus was born the Fence-a-Mole, so named because it combines elements of fencing and Whack-a-Mole.
The video above shows the actual game play, but I'd like to talk a little bit about what makes the game tick. I'd also like to send a shout-out to Nick, who built the lightsaber I use in the video with our new Spectacle platform a few weeks ago.
There are five "nodes" in the game: four posts and one controller. The controller is a PC (or Raspberry Pi, if you like) running a Python script. It gives the order to a particular post to start a timing cycle (i.e., turn on the light and start counting the time until impact).
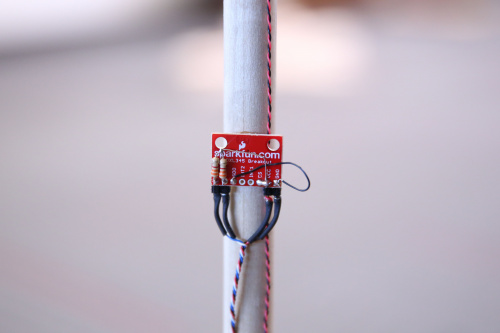
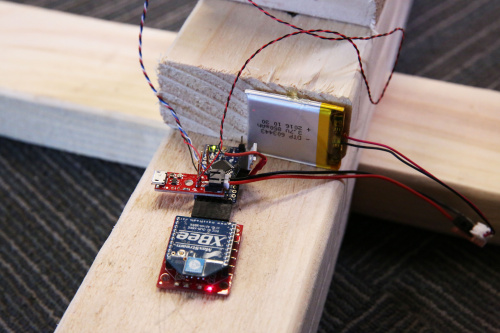
Each post has an Arduino Pro Mini, an XBee and an ADXL345 accelerometer.
The accelerometer is attached to the striking post and has the "tap detection" feature enabled. It turns out that the tap detection feature is able to very accurately differentiate between the post being struck and the post bouncing around after a strike.
The communications for the system is done via XBee. This presented some interesting challenges, as all nodes see all communications and must ignore what is not for them. To make matters worse, there are occasionally dropped characters. To overcome this, I had to implement a resend protocol where a sender looks for a receive character, and I also had to implement a check-summing system for multicharacter messages.
I don't really consider this project "finished," because I want to make a nice, visual front-end for use with a Raspberry Pi touchscreen. That's outside of my normal skillset, though, so I wasn't able to get it finished in time for this post. Oh well!
If you want more information on how this works, check out the GitHub repository for the project! There, you'll find the current code (which works, mostly).
And please share your thoughts in the comments below!
