Our New Desktop Pick and Place Machine
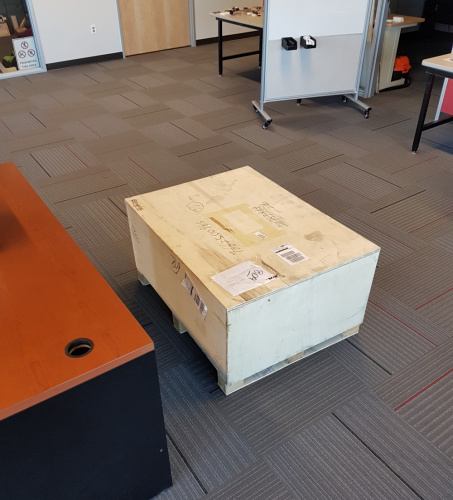
Unboxing the $2800 desktop pick and place machine.
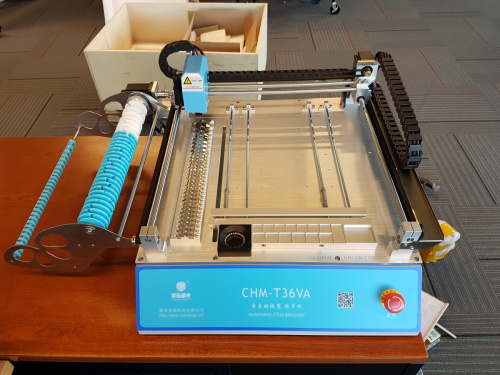
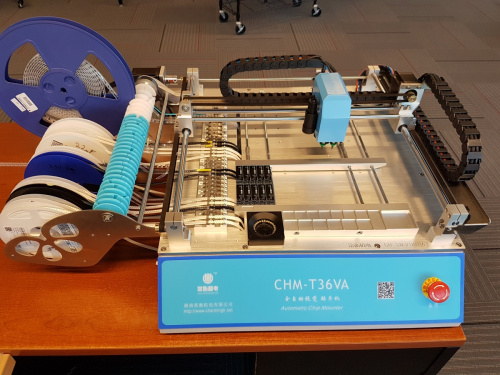
In late 2017 we ordered and received the CHMT36VA from Charm High. The cost was $2800 with a $640 DHL shipping charge. That’s an incredibly cheap price for a pick and place machine! The company was surprisingly responsive and quick to ship. We sent the wire on a Tuesday and were uncrating the machine the following Tuesday.
It took only a week! This was wonderfully fast for such a large piece of equipment.
This machine is cheap meaning you’re going to have to put up with quirks, problems, and very little support. Our MyChronic is way faster and far better behaved but it should be: it costs in the neighborhood of $250,000.
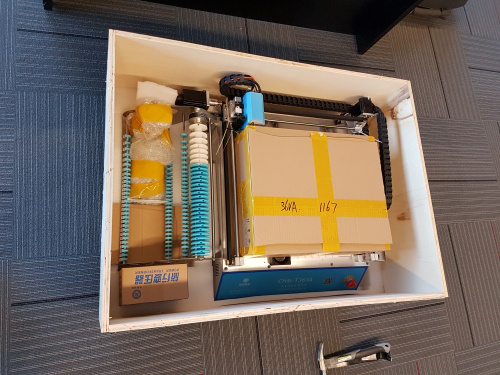
The machine arrived well packed and in good order.
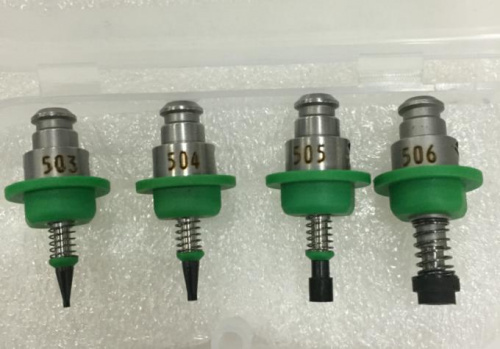
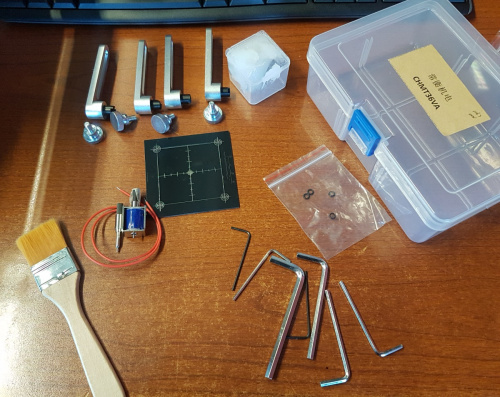
The machine included four Juki nozzles that manually insert into the two heads on the machine. It's pretty easy to swap out nozzles but we've installed the size 503 and 504 nozzles that have worked well for all our needs so far (0603, SOT, SOIC-14, 7x7 QFN, etc).
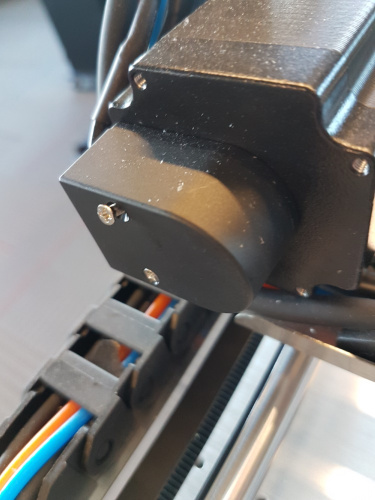
A quick inspection showed one loose screw on the cover of the encoder. This could have been a disaster. Check everything before powering up a new piece of equipment.
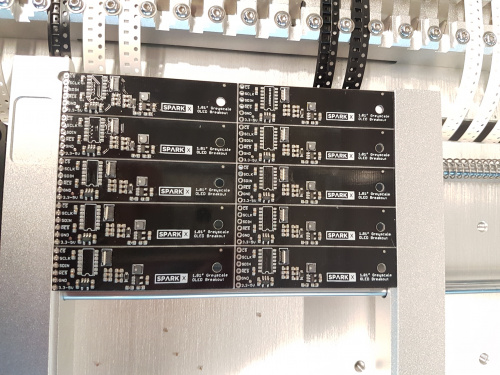
Click on the above image to get a high-res photo. Most of the components are well aligned. The connectors give the vision system a heart attack. And we didn't have the TXB0104 in a tape and reel so we simply hand-placed it (SOICs are easy!).
We’ve been using the CHMT36VA for over a month now and learned all sorts of fun things that we’re going to share in upcoming posts. Overall we’re really happy with the machine. There is a lack of support (it seems problematic across the low-end desktop pick and place category) but we’ve worked hard to create a workflow where we can really build a lot of boards flexibly and quickly.
ReplaceMeOpen
ReplaceMeClose
Why did we choose to go with the CHMT36VA? Well, if you have an hour there is a great discussion on the EEVblog forum of various manufacturers with the biggest one being the Neoden 4 (and a marathon discussion that is 53 pages long). There is no agreement to the discussion but it’s a wealth of opinion and a few data points.
There’s also a handful of good videos floating around youtube:
- Ian Lesnet’s classic review of the TM220A - Basically don’t buy a machine without a vision system.
- Collin O’Flynn had a nice video of the CHMT36VA building ESP32 based boards that really got me interested in the CHMT36VA. Collin also has some great hints and documentation in his CHMT36VA repo.
- This one is just hilarious but it captures how we feel every time the machine does its magic.
- Here is a video of a different machine (TM240A) by our long time friend Brian Schmalz. It shows how similar the various manufacturer’s machines look and how a machine without vision will operate. Note his remark ‘not able to reliably place the CPU’.
- Andrew Kilpatrick’s review was the nail in the coffin for the Neodyn 4 in my eyes. At 7:51 in the video he says the feeders aren’t that great, they are challenging to load, and machine makes mispicks quite often. Why spend ~$10k on a machine when I can have a cheaper machine with less hassle? The CHMT36VA is far from perfect but I can work around the problems.
Let me say that the needs or SparkX are slightly odd. We need to build 10-50 of a design and see how it sells. As it sells we may need to build 100-500pcs. If a design needs more than 500 pieces then it immediately gets moved over to our proper SMD production lines with much more capable machines. SparkX needed something small and quick to setup. After evaluating all the various vendors we decided on the CHMT36VA. It seemed to be the best fit of low-cost and most flexible while being able to get the job done.
The machine came with a small box of tools, replacement parts, and tray fixtures. We haven’t needed any of them except for the 1.5mm hex key for adjusting the set screws on the tape tensioning wheels.
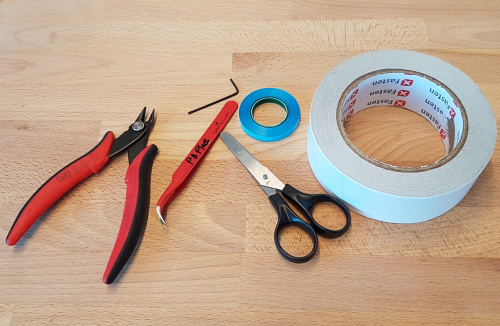
Here are the tools we use all the time and recommend:
- Flush cutters for cutting off tape waste
- 1.5mm hex for adjusting friction set screws on tape retention wheels on feeders
- Curved tweezers for grabbing expensive parts before they fall into the depths of the machine
- Simple scissors for cutt’in stuff
- 1/4” audio splicing tape - we found that this tape is a great, cheap way to add a leader to a cut tape
- Double sided tape is useful for testing the location of a mount. We don’t use it often, rather, we just use paste and step slowly through a work file to verify everything is where it should be, but it’s good to have.
Remember, you do not need a pick and place machine to build electronics. We built over 1,000 SparkX boards in 2017 by hand using nothing but tweezers. It worked fine. A pick and place machine is only needed if you have considerable volume. I’d say the CHMT36VA and the similar desktop pick and place machines are a good fit if you have:
- A single design or a few designs that are limited to ~20 unique parts. It’s crazy how quickly the feeders fill up. Changing feeders is doable but time consuming (~4 minutes for a tape change and another 4 minutes to update build files).
- A design that has a significant number of polarized components like 0603 LEDs, diodes, connectors, etc. Mounting these by hand is especially painful because parts go everywhere when you remove them from their tape.
- A design you need to build around 100 pieces. Setting up a pick and place machine to build 1 board is silly. Setting up the machine to build a panel of 9 is doable. But the sweet spot is ~ 100 copies of the same thing. If you need 5k of something, get a bigger, faster machine or talk to a contract manufacturer.
Pros:
- This machine is just plain fun to setup and run and is mesmerizing to watch. It’s fantastic that we no longer have to place tens of thousands of 4.7k resistors, 0.1uF caps, or Qwiic connectors!
- It’s fast reaching over 2,000 components per hour with vision on. Yes, I know there are lots of much faster machines but when you need to build a couple hundred boards the CPH of a machine is not your bottleneck.
- It works reliably. We still have issues with the webcam cutting out. See quirks below.
- It’s a very common design and should be relatively easy to source replacement parts as they break.
- The machine does not have a built in computer. This means the base cost of the machine is cheaper but you have to provide your own computer. This is a great thing: being able to open the PCB files, output a work file, and immediately start clicking in the Pick and Place software makes setting up a new build very fast and efficient. If you are only building one or two designs then consider one of the machines with the built in computer. But it’s really nice not to have to deal with a built in computer.
- No compressor/vacuum needed, the machine has everything built in. There’s only three cables needed: power, USB for the computer vision, RS232-USB for communication.
Quirks we’ve discovered so far:
- The software is so-so. The main limitation is that you cannot adjust the brightness or contrast of the cameras. The computer vision (CV) system can identify and place 0603s all day long! But if you need to place a connector or QFN you’re going to have significant problems. We’ve added lighting to try to help with the CV but then it fails to identify the 0603s properly. Ideally the software would allow brightness/contrast/light-off settings for each components.
- When the CV does capture a part it can sometimes get the boundary box wrong. We expect to the need to ‘bump’ a few components before reflow on every panel.
- The machine uses two webcams to do the CV and some sort of video multiplexer to swap the feeds to a single USB port. The computer sees just one camera. Nearly every time we start the software the camera feed is not working. We have to power down the machine, shut down the software, unplug then re-plug in the USB cable and start the whole process over again. Remember, it was less than $3500 for a pick and place that used to cost $50k, right?
- The machine has a unique serial number that the software checks at each power on. We didn’t receive our license file when the machine first arrived so that took an extra day to get from the manufacturer.
- I wish I had more feeders! We are already hitting a filled feeder area which means we’re starting to have to swap out feeders. Not the end of the world but I wish I could have the larger CHMT48VB and double the number of feeders. Unfortunately they only (currently) offer this size machine with a built-in computer.
- We originally ordered a tube vibration feeder for $80 that we have not used yet.
- Maximum component height on the CHMT36VA is 5mm. This is because of the geometry of the machine. For some designers this is a deal breaker. For SparkX, 99% of the things we place are under 5mm tall. If we have a really tall electrolytic cap we'll place it by hand.
Thanks for reading! Please checkout the other posts on our desktop pick and place machine.
Do you have one of these machines? Want to share your tips and tricks and ask other owners a question? Join the Desktop Pick and Place google group!
Related Pick and Place Blog Posts:
- Unboxing the $2800 desktop pick and place machine
- Creating a Leader for Cut Tape Components
- Installing the Charm High Software
- A better English Translation for the Charm High Software
- An EAGLE ULP script to create a CHMT36VA work file and start placing components in less than a minute!
