Wedginursday: Frame Rates and Funky Colors
Let's figure out just how fast we can push data through APA102 pixels. Then let's look at what we can do with super fast lights.
I've been experimenting with the APA102 LED lately due to their ability to operate at extraordinarily high frequencies. I want to see if I can use these for a persistence of vision (POV) display, and if I can, I'd like to see just how many LEDs I can run at a POV capable frame rate (typically something around 1000 FPS should work, but for wider displays where LEDs are swept across a larger space, higher frame rates are desired).
What is Persistence of Vision?
Persistence of Vision is a neat little phenomena that exists thanks to your brain and afterimages. An afterimage is an image that stays in your vision after you've looked away from the original visual stimuli. If you've ever gotten a picture taken of you with a bright flash or played with sparklers on the 4th of July, you'll know exactly what I'm talking about. This sort of effect occurs because sight is a photochemical process. In other words, light interacts with chemicals, your cells see this and send signals along the optic nerves to your brain based on these chemical signals. When you see something (especially something bright) the chemicals in your eyes become depleted. This causes an afterimage from the object even though you aren't necessarily looking at it anymore (don't stare at the sun, kids).
Thanks to these afterimages and this effect, we're able to perceive things like video, which is a series of photos flashed just quickly enough to blur together. This tends to be around 30 FPS for most video, although when things are moving quickly (like in sports or a fast-paced movie), frame rates as high as 60 FPS might be required for a smooth image.
Taking this into (design) consideration
Since these afterimages "stay" in one spot in our vision, by sweeping pixels through the air we can use LEDs to paint images seemingly in thin air. The fun with these displays is that you need to run your lights at a high refresh rate so you can have a high resolution as you sweep your pixels through the air. A higher frame rate means the pixel can be swept through the air faster. The larger a POV display gets, the faster the outer pixels will be swept through the air, so a higher frame rate translates to bigger displays. However, a bigger display means more LEDs, which in turn means a slower frame rate.
Fast Hardware
In order to accomplish an ultra-fast frame rate, we'll need some specific hardware. I went with the APA102 LED due to the fact that, unlike some other LEDs, like the WS2812, it has an external clock. Since the clock is provided by the microcontroller it's far easier to synchronize all of the LEDs and the controller, allowing for longer, faster strings. This has enabled various makers to push data cleanly through 1000+ pixel strings at speeds around 30 MHz.
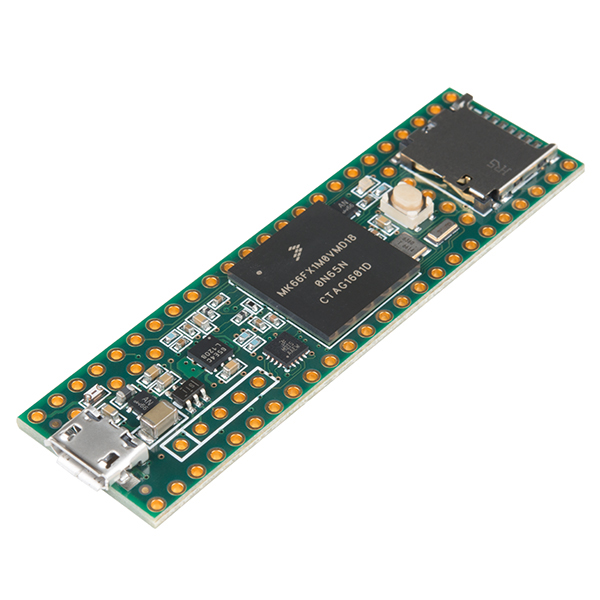
Now we need something that can run our SPI bus at 30 MHz and still have clock cycles to chew on for any animations we want to run. For this I chose the Teensy, as it can run its SPI bus that fast, and I also discovered a little trick to get more out of fewer pins on the Teensy. I'm also using the FastLED library, which is devoted to running lights on as few clock cycles as possible.
I Cheated
The APA102 has a communication protocol that can be taken advantage of to control four LED strips with only four data pins (you should normally need eight). In order to accomplish this, I wired my four strips according to the table below.
| Strip | Data | Clock |
|---|---|---|
| 1 | 7 | 13 |
| 2 | 7 | 14 |
| 3 | 11 | 13 |
| 4 | 11 | 14 |
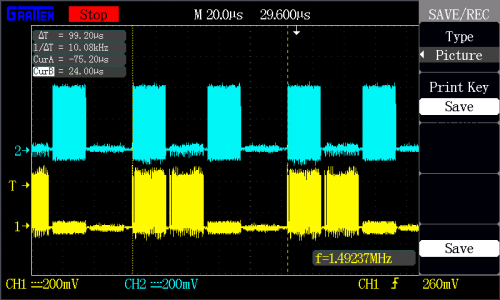
You can see all four pins have two wires connected to them, each wire being from a different strip. This setup takes advantage of the fact that when strip one is being driven, the data won't affect strip two due to the lack of a clock signal for strip two, while the clock won't affect strip three due to the lack of data for strip three. This sort of logic repeats for the rest of the strips, allowing our Teensy to be able to juggle four LED strips around on four data pins – pretty neat! Check out the below oscilloscope capture of pins 7 (yellow) and 13 (blue) to get more of an idea of what's going on.
This is also a great way to look at frame rate, which in this setup (a mere 60 LEDs) is hitting a whopping 10,000 FPS, which is overkill for most applications, but it's also not many LEDs. Increasing my number of LEDs to 1,000 brought me down to around 770 FPS, which is about the minimum for what I'd like for POV applications. A 500-LED display would put me at 1,500 FPS, the sweet spot for what I'd like to do.
Hypothetically, you'd be able to get 24,000 LEDs (four strings of 6,000 LEDs) running at around 30 FPS, but I don't know how clean the signal will look after being sent through 6,000 lights, I don't have that many LEDs lying around for a hypothetical. Also, powering something that size would be a neat little problem in itself.
Other Applications
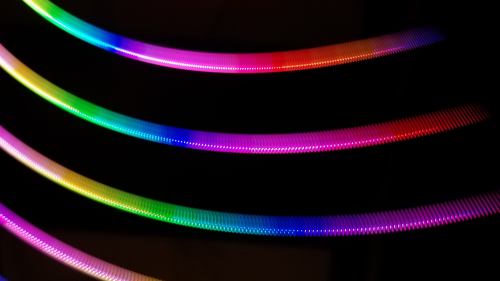
After some initial testing I settled on a frame rate of 7,650 FPS to do some testing for some motion-activated color gradients. What I did was take a color gradient and cycle through at a speed high enough to run through the whole 255-color gradient 30 times every second without losing any resolution in the gradient. This flashes through all of the colors fast enough that if you hold the strip still, the afterimages stack on top of one another and you see an average of all the colors (the rainbow will show up white). Moving the LED around as it does this will allow you to see the rainbow, as now the afterimages are all in different locations instead of stacked on top of one another. I took some long exposure photos to visualize the effect and they came out great! You can actually see each individual frame refresh if you look closely at the image. The LEDs almost look like little stacks of colored coins, where each "coin" is a frame.
Interested in learning more about LEDs?
See our LED page for everything you need to know to start using these components in your project.
