From the Field: The AVC Renaissance Man
We get by with a little help from our friends, specifically Jesse Brockmann.
Over the next few weeks, we’ll be letting some of our customers take over the blog to talk about how they use their favorite SparkFun tools and products in their projects, businesses and everyday lives. The best part? All the SparkFun items on their wishlist will be on sale today only!
Jesse Brockmann is a senior software engineer with over 20 years of experience. Jesse works for a large corporation designing real-time simulation software. He is a long time maker, and he first purchased a gyro and other components from SparkFun in 2006 to build a rover.
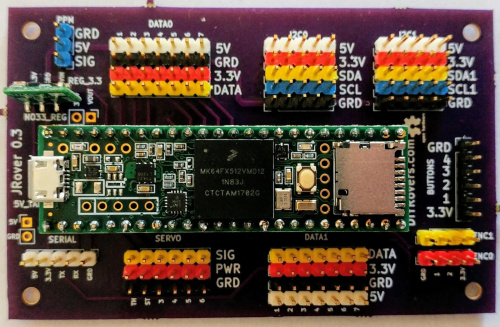
I’ve used many micros for my projects through the years, from a PIC Micro using an Olimex development board from SparkFun, basic stamps, PICAXE, Arduino Uno and Mega, Maple Mini and Mbed. All of these left me wanting more, and then I encountered the Teensy. I designed several projects using the Teensy and I was hooked! My first Teensy was a 3.0. Since then I used the 3.1, 3.2 and 3.5. The majority of my new projects use the Teensy 3.5. The speed of 120mhz and 256kb of RAM, 5V compatibility, and the ability to communicate and program via USB with onboard microSD are amazing. The price is also very reasonable.
Jesse's wishlist (on sale today only!):
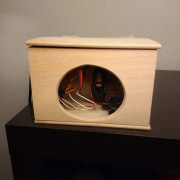
The above is a project I created for a solar water pump control project. It will be exposed to the elements and needs to be very robust. This the first prototype.
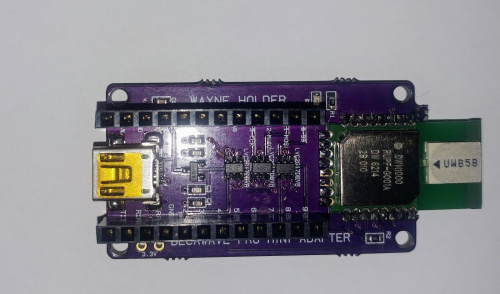
If anyone is serious about electronics, eventually you will want to invest in tools beyond a soldering iron. At some point, through-hole components won’t be enough. So, how do you solder SMD components? My current choice is to use a Hot-Air Rework Station - 303D. You can tin the pads with a conventional soldering iron, or use solder paste. Then place the component using tweezers, hold the component and heat the solder until it melts. I’ve also used the rework station to remove components when they need to be replaced, or to touch up solder joints that looked questionable. You can read more at the tutorial from SparkFun. The breakout board above for the Decawave DWM1000 was designed by Wayne Holder and assembled for me by a friend using the Hot-Air Rework Station.
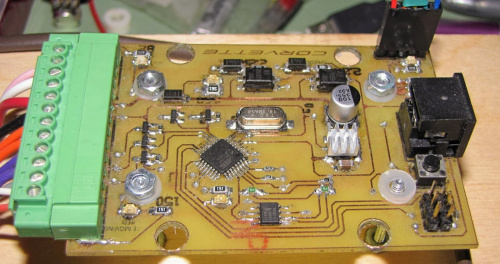
This board was created by my friend Alex Baer. It intercepts the tachometer and speedometer signals from a Corvette for a large project to add a push-button start to his Corvette.
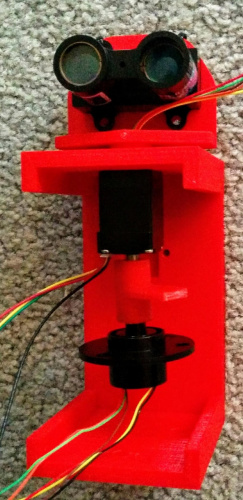
I’ve tried many different sensors on my rovers over the last seven years, but it’s very difficult to find a sensor without flaws. The LiDAR Lite is an amazing sensor, with long distance sensing at a high sample rate. Being I2C-based, it is easy to interface with, and you can have multiple sensors on the same I2C network. I designed the above scanning LiDAR Lite setup years ago, but decided it was too complex. Instead I suggest using a servo to scan back and forth for a reasonable setup for detecting obstacles.
The above image is of Ted Meyers's rover Daisy Rover. He is using a LiDAR Lite attached to a servo, and two TFMinis for side coverage. The servo has been modified to provide position feedback, and a protective visor was added to block direct sun from the sensor. You can read all about the LiDAR Lite at this tutorial.
In addition to these products, there are several I frequently use. The Raspberry Pi 3 B+ is an amazing board that I use when I need a more complex controller for projects. I’m also very pleased with the serial version of the TFMini LiDAR, and the new TFMini Qwiic version should simplify use in a project.
I’ve used SparkFun products for 12+ years, and I’m sure I’ll make many more projects that use SparkFun products.
Special one-day pricing available to customer and guest checkouts only. Prices expire at 11:59 p.m. on the day each post is published.
