Enginursday: Qwiic Escape Room
Hop on the I2C BUS and let's build Escape Room puzzles Qwiic!
Making a Qwiic Escape
Escape Rooms have been a quiet obsession of mine for the past several years, I “subtly” suggest them for nights out, birthdays or team builds whenever I can. Once inside the Time-sensitive puzzle I often find myself spending time examining the puzzle after the solution has been found. This no doubt causes some amount of heart-burn among my fellow Escapees who are actively trying to figure out the NEXT puzzle. In recent years there has been a proliferation of micro-controllers and electronics used in these puzzles leading to many, “How did they do that?!” moments. Since starting here at Sparkfun, there has been a desire to start making puzzles of my own and the recent Qwiic boards made it fast and easy to put a couple together. Now I can finally stop gazing into that opened cabinet and focus on finding what that brass key unlocks...
Escape Rooms
If you are not familiar with Escape rooms, they are essentially a series of puzzles that when completed “free” you from the room. They are often tackled as a group and there is often a time limit that adds excitement and urgency. Sparkfun has even gotten a tour of a local Escape Room. Often you will need to hold onto a Key, piece of coded information or a clue through several puzzles before you find their relevancy.
Our Qwiic System
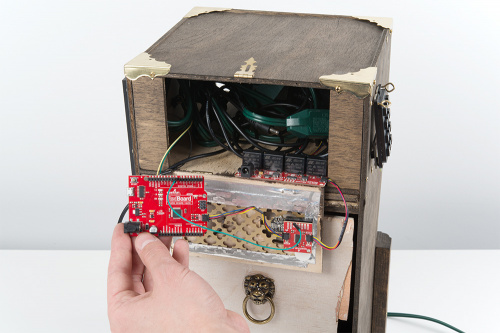
The Qwiic Escape box showcases a couple of examples of puzzles similar to what you would find in an escape room. Often time the reward for solving a puzzle in the room is an opened door, drawer or cabinet that offers more clues towards another puzzle. I wanted to show three different triggers that open a locked cabinet. The unlocking mechanism is a simple 12V Solenoid drawer latch that is connected to the Qwiic Quad Relay. This allows control of High Voltage devices such as the Solenoid and some 12V LEDS with a lower power device such as the Redboard Qwiic. When our Redboard receives the correct input over I2C it can send a signal to the relay to activate the solenoid and start the lights. All devices are on the same I2C bus which allows for easy commands and communication.
Trigger one: Qwiic RFID
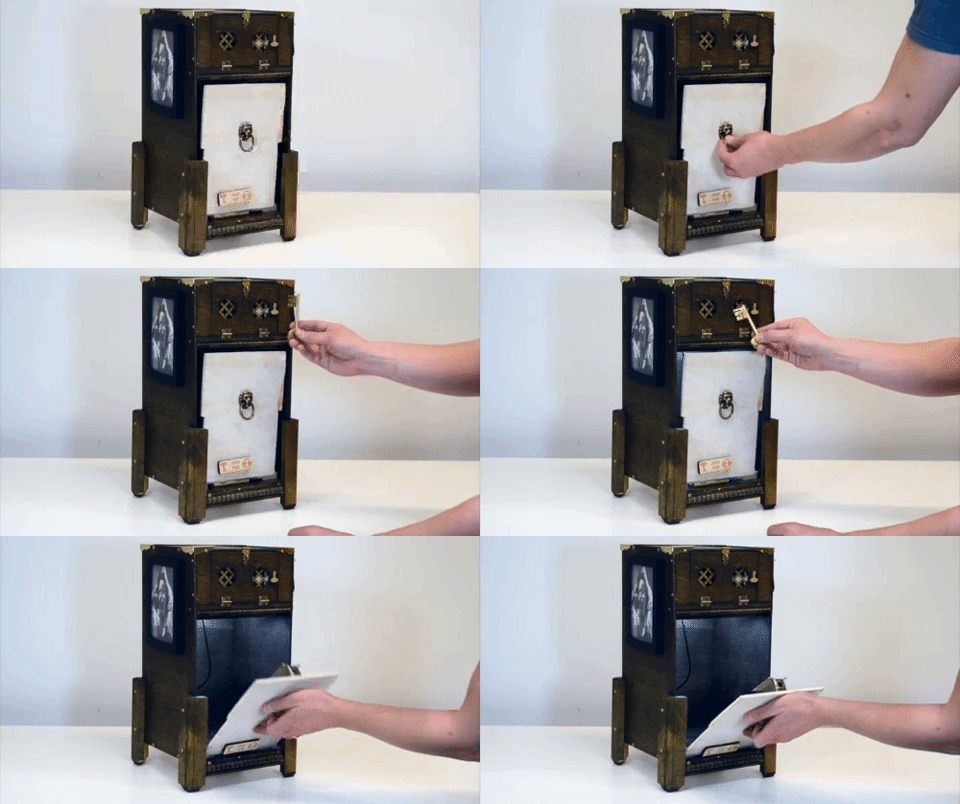
RFID is one of the most common technologies that you see in escape rooms. Often you will need to place an object or objects in the correct positions or in the correct order. I 3D printed a key and placed a glass capsule RFID tag inside. When the reader picks up a tag ID, the Redboard compares that ID to the specific tag of the Glass capsule. If it’s a match, then it sends a command to our Qwiic relay which activates our Solenoid latch and LEDS. And Voila~
Trigger Two: Qwiic Keypad
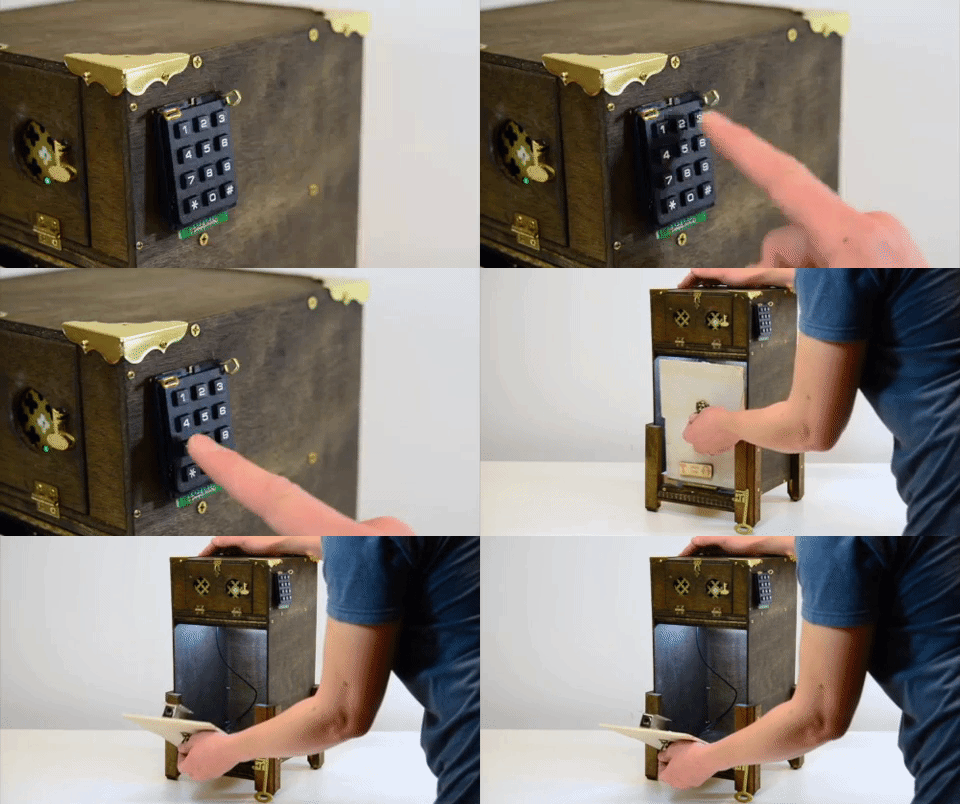
What is a Keypad but an array of buttons? Button arrays are also often found in escape rooms often with eldritch symbols or hieroglyphics. If the astute puzzler enters the Eleet code needed, they will be rewarded. As the keypad’s buttons are depressed it sends a communication to our Redboard of what button was pressed and when. If the correct arrangement is pressed within a certain time window then Redboard recognizes this and sends those familiar commands to the Qwiic Quad Relay.
Trigger Three: Photo Cells
Finally I wanted to connect a familiar product that all S.I.K. owners know well. The Photo Cell Resistor!
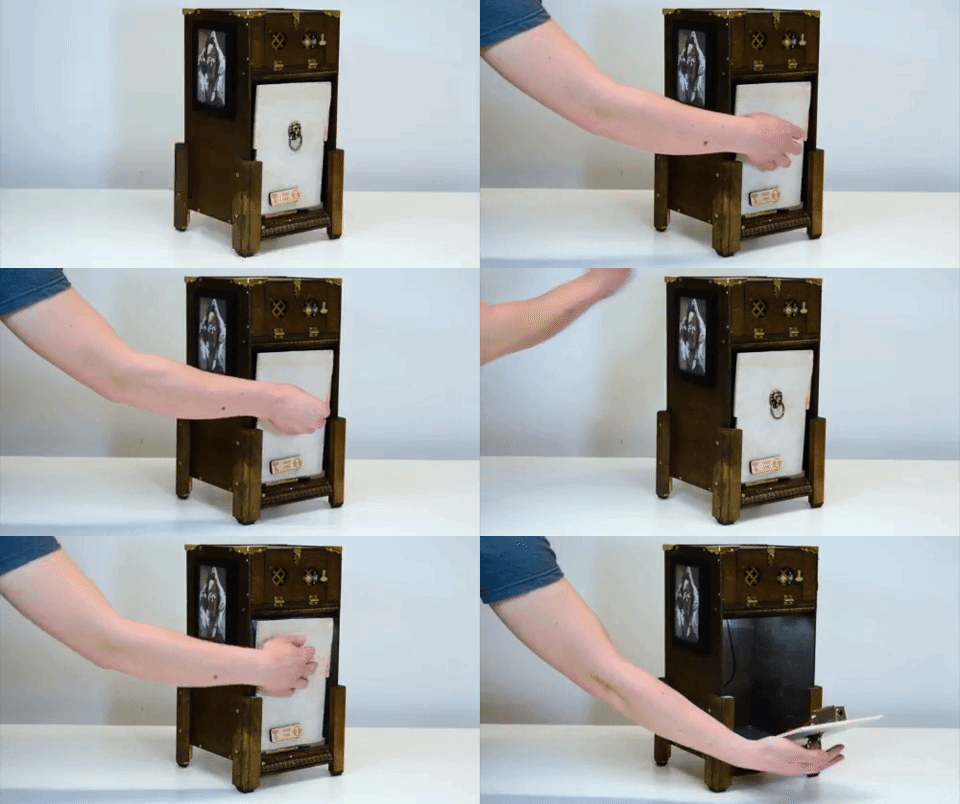
The Photo Resistors change resistance depending on the amount of light that it is exposed to. I connected the photo cells to the 5v output of the Redboard and I am reading their input on the analog pins. Please take a gander at our Tutorial if you’d like to see a diagram.
The photo resistors are placed inside the eyes of this desperate man and when “blinded” we can read that state with our Redboard and activate the Quad Relay.
Final Thoughts
The pairing of the I2C communication with solderless Qwiic Connectors made prototyping this project a breeze. Don’t get me wrong, I love soldering, moving molten tin is my jam, but having the option to test before committing to the iron was a huge time saver. Often I’ll solder wires and connection points only to find that I need a longer wire or I need to change the orientation of a sensor. I was able to individually test out code with each device before plugging it all together on the same I2C BUS. For my next Escape Room styled project I would find a more elegant power solution that a host of 12V wall-warts tied into the Quad Relay.
Puzzles are a hot topic here at Sparkfun and invite to you check out our Innovative Puzzle Board
As well as some of the great content that community has shared with us.
Please share your thoughts in the comments and go support your local escape room!
If you are interested in building your own Qwiic Project, here is a wishlist of what I used and keep an eye out for the upcoming Qwiic Kit!
