Get a Better Night's Sleep with Technology
Some people have a hard time getting a good night's sleep in a strange bed, but nobody wants to wake up exhausted when they're on traveling. I decided to see if I could remedy this issue with a few SparkFun parts and a fast 3D print.
Sleep (slēp, sliːp) noun The resting state in which the body is not active and the mind is unconscious.
I start this blog with a definition of sleep because it can tend to be somewhat of a foreign concept to engineers and makers (and of course, students). For those of us with a delayed sleep-wake phase who still have to wake up early, sleep can be particularly decurtate.
One of the biggest influences on sleep is the sleep environment, with sound being a major factor. Travelling will naturally create variations in one’s sleep environment, and can wreak havoc on a person’s quantity and quality of sleep. In my house, we have a sound machine in the bedroom to help block out the external sounds around our house. However, as we recently found ourselves traveling to take our daughter off to school, I knew that our 110 V sound machine wasn’t going to be of any use where we were going. Nevertheless, I knew that my wife would sleep better in a strange hotel room with the comfortable and familiar sound to which she had grown accustomed. This seemed like a golden opportunity for a quick and simple project.
Sound-based projects are one of my favorite project categories, so this was really a no-brainer. The only issue I had was this - the idea came to me on Saturday morning, and we would be leaving on Tuesday morning. I wasn’t going to be back at SparkFun HQ before our flight, so I was relegated to only using parts that I had on hand. I was quite certain that I had some sound components, I just wasn’t sure which ones. After a little digging, I found the parts necessary to create an easy, battery powered sound machine.
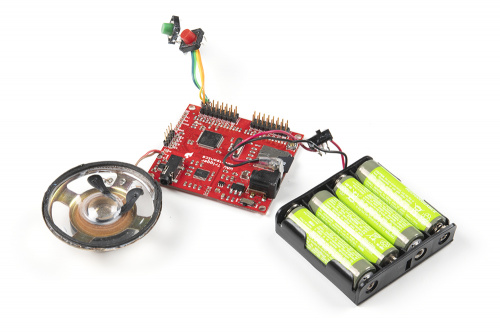
The build for this was really straightforward and simple. I just needed something that would play a sound file (WAV, mp3 or OGG, depending on which board I would be using) when it’s powered up. I also figured I should have some way to control the volume. I needed power and an output, namely a speaker, and figured that should be everything.
I first found a SparkFun MP3 Player Shield, but I knew that would require a microcontroller as well, and I didn’t want to use that much space. Luckily right underneath that was a WAV Trigger. This board is capable of playing sounds without the need for a separate microcontroller, so I went with this. As this board requires between 6 V and 15 V to operate, I grabbed a 4xAA Battery Holder and added an inline power switch. I pulled a random speaker out of my drawer of small speakers, and a pair of multicolor buttons for volume control.
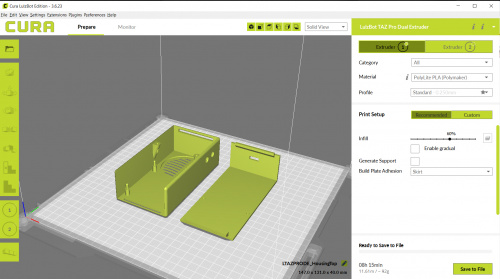
I knew that a random assemblage of electronics parts, no matter how scientifically or passionately my explanation of them, would only end with me in that windowless FAA holding room at the airport. To avoid that experience, I designed a quick housing that I could 3D print.
I took measurements of all the components I would be using, tried a few different configurations, and came up with a workable design. It wasn’t perfect, but it was done, and functional - and with my departure fast approaching, done was the goal. The speaker, WAV Trigger, and volume buttons would be built into the top half, the battery holder and power switch built into the bottom half, and a simple pair of headers connecting power to the board. A couple of through mortises and tenons plus a pair of screws would hold the entire thing together.
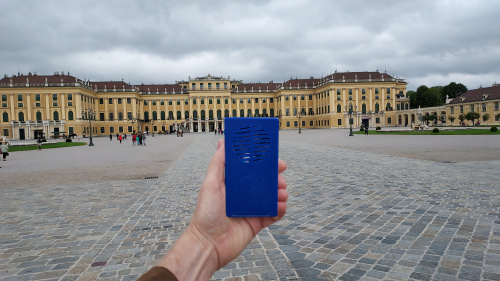
In the end, the traveling sound machine worked just as it should. When I turned it on, the sound of a babbling brook emanated from it. I was able to adjust the volume up and down, outside noise was canceled out, and sound sleep was had by everyone.
However, there are a number of things that I will change, should I decide to make a v2. The first is the size. Since I was relying only on parts I had at home and time was limited, I used much larger parts than I would have chosen given more time and product availability. The WAV Trigger required at least 6 V to operate, sticking me with four AA batteries for my power source. The four AA battery holder shares a similar footprint with the WAV Trigger, but adds a tremendous amount of depth to the project. I also could have gone with a smaller speaker, but again, I was playing “What’s available here in my salvaged parts drawer?”
Secondly, I would spend more than fifteen minutes designing the housing. While this was practical enough, I just left the speaker in a wide open cavern, so the sound output was very echo-y. Since this was meant to be designed for travel - something small that you could just throw into a carry-on bag - the next incarnation will probably use something like the SparkFun Little Soundie Audio Player with a SparkFun Noisy Cricket Stereo Amp and a smaller speaker, powered by a 2Ah Lithium Ion Battery. This would all make for a much smaller build.
Additionally, I would spend a bit more time designing the housing, particularly around the speaker, to create a cleaner output. Of course, if I stay up late working on this, doesn’t that sort of defeat the purpose of a project designed to aid in a good night’s sleep?
