T³: Heated Blanket Teardown
Sarah takes apart a non-functional heated blanket to have a look around
While at a local thrift store recently, I came across a non-functioning heating blanket. The place was willing to give it to me for very cheap since they just wanted it off their hands. I know a thing or two about electronics and was curious to see what was in the guts of this blanket, so I figured that I would take it apart on camera for anyone else that might also be curious.
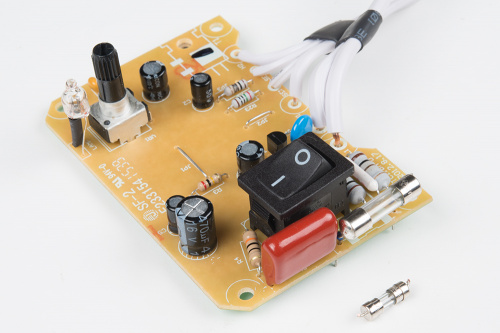
When I was taking it apart, I found a fuse which I decided to take out and test. It was both broken and a common enough rating that I decided to try and replace it, to see if that would fix the heating element. A lot of the time fuses blow because another electronic piece has stopped functioning, so I knew it might take more than that, but I decided to give it the ol' college try.
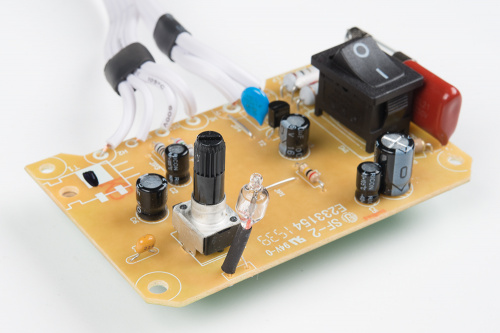
Once I opened it up, it was pretty simple, and consisted of what you would expect.
There was a switch for power, a potentiometer for the heat level, an LED indicator and lots of capacitors and resistors of various sizes.
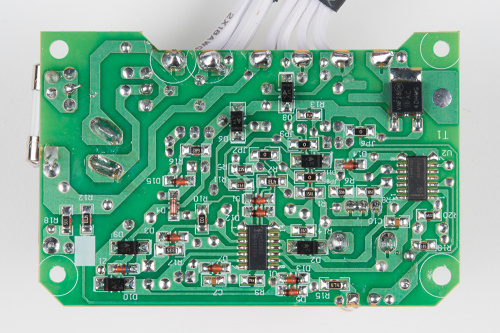
On the back there were more resistors in chip form, lots of rectifier diodes, what I assume is another AC to DC converter, regular diodes, a LM339DG comparator chip for dealing with input from the dial, and an MC14541B programmable timer chip for the 10-hour switch-off safety feature.
There was a 2A 250V fuse on the board, which I removed and replaced with a fuse with the same rating (although a slightly larger size, since I couldn't find the same size in my toolbox). I didn't think this would fix the blanket, and when I plugged it in after replacing the fuse, the light (which I found out was not an LED but a little bulb) didn't light up, so I figured it wasn't working.
SPOILERS!
However – as we were filming me saying it wasn't working, I felt the blanket heating up! The little bulb just wasn't functional, and may have been what burnt the fuse out. YAY! I am a happy little hacker.
Hope you enjoyed my teardown, let me know what you think and if you have done anything similar. Until next time! ^_^
