Enginursday: Atmel Studio 7 and Atmel START
Atmel Studio 7 supports a web-based design tool called START. We'll take a look at this design tool pair and the time to blink on a SAME54 Xplained board.
I don't know about you, dear reader, but I've gotten so spoiled by the ease of popping out some code in Arduino that I've almost forgotten what it's like to work with a real, professional design tool. I recently received a sample SAME54 Xplained board, and I thought I'd give it a whirl in Atmel Studio 7.
The SAME54 Xplained Board
-> 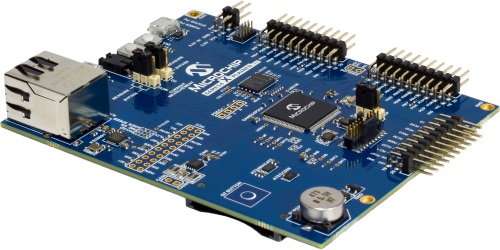
Image courtesy Microchip <-
The SAME54 is a powerful processor, sporting a Cortex-M4 core, built in Ethernet, USB, SD and CAN. The ATSAME54P20A on the SAME54 Xplained board has a full megabyte of flash and 256kB of SRAM. The board has an Ethernet jack and an SD card slot onboard, along with 32MB of QSPI flash, an ECC crypto device and a CAN transceiver. It also has multiple headers to support add-on cards available from Microchip. Last but certainly not least, it has an onboard debugger, meaning you don't need an expensive programming tool to develop applications on the processor.
Atmel Studio 7
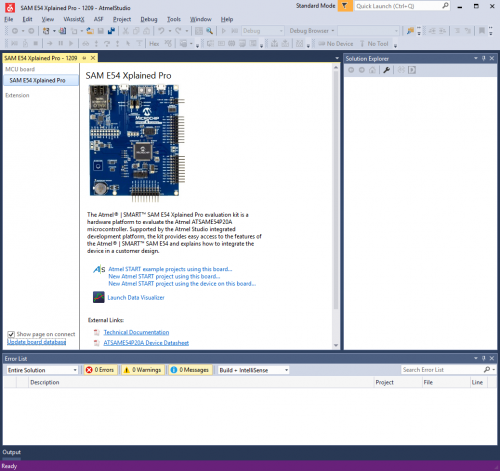
I downloaded Atmel Studio 7 and opened it, with the SAME54 board (henceforth, board) plugged into USB. I was pleasantly surprised that Studio 7 immediately noticed the board attached and offered me some options for playing with it.
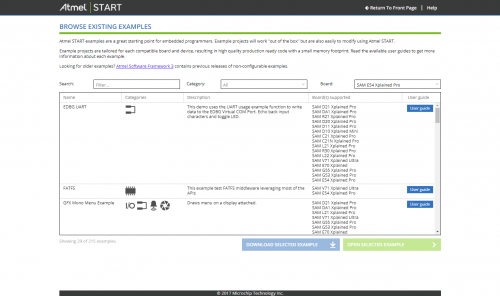
Fumbling for a next step, I decided to click the link called "Atmel START example projects using this board." I'm not sure what I was expecting, but I wasn't expecting to be brought to this website and offered a list of example projects:
There's a nice little list there. I chose the "LED Switcher" example --- basically a program that toggles the state of the onboard LED with the onboard button. Clicking the "Download Selected Example" button provided me with a list of target boards that I could choose from; I selected the SAME54 Xplained from the list, and the download began.
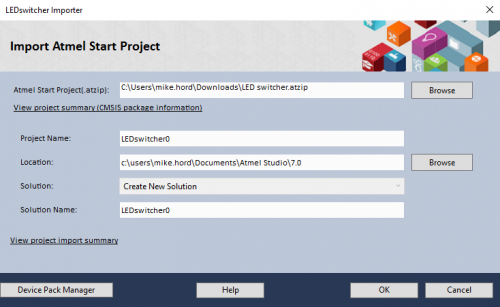
The downloaded file was of type ".atzip" and I was a little concerned that I was going to have to jump through hoops to extract it. But it turns out opening the file in Windows brought up Atmel Studio 7 with options to import the selected project!
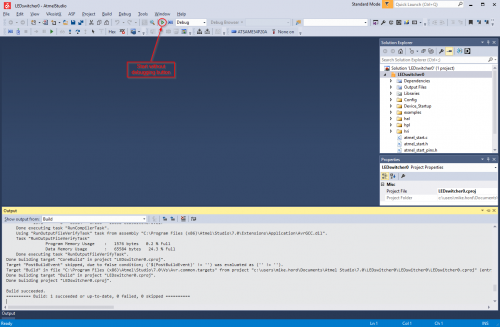
Clicking the "Start Without Debugging" button built the example (no errors!) and uploaded it to the board. It Just Worked.
Changing Some Things
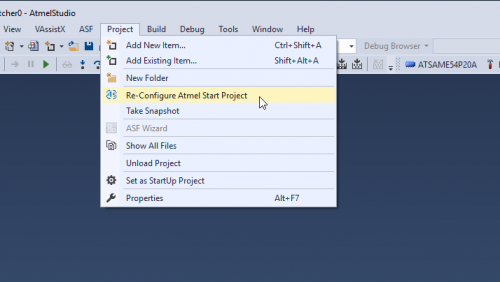
One of my first post-blink tasks on a new system is to figure out how to implement a system clock, sort of like the Arduino millis() or micros() command. I figured the easy way to do it is to implement a timer, and I looked in vain for a timer example project. Failing to find one, I just started poking around. That's when I found the "Reconfigure Atmel Start Project" menu item. Intrigued, I clicked on it, and something pretty neat happened.
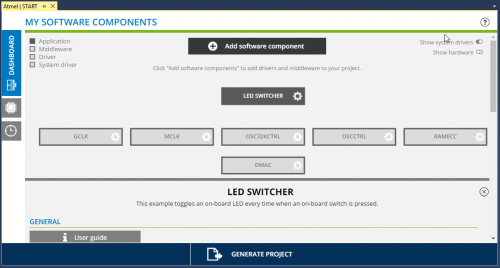
It opened up a hitherto unknown (to me) aspect of START: a software component configurator!
Clicking the "Add software component" button allowed me to add a timer to my project. It, of course, provided many other options, both in driver level (i.e., PWM, ADC, RTC, Delay, etc.) and in middleware level (i.e., USB stack, ethernet stack, etc). Clicking the "Generate" button at the bottom of the page filled in my solution with not only the support files for a timer, but some example code as well! Nifty!
Buuuuuut...
I decided at this point to try to change the clock generation option for my part, since it can run up to 120MHz and was running at a mere 12MHz. Back in the START reconfiguration page, I found the clock generation section and fumbled with it for about half an hour before I gave up and accepted that 48MHz was the best I was going to get. I was disappointed by that aspect of the START system, and I haven't been able to find documentation that might tell me what I did wrong, either. So, there are still some sticky wickets in the START system.
Final Verdict
All in all, the START system in Studio 7 is a fairly robust means of generating the core files, along with example code, needed to make a good start on an Atmel project. I look forward to seeing what they do in the future to support new products and whether the documentation around some features improves.
