Making a Weather Station at SparkFun HQ
Check out our latest project! We mounted our SparkFun Arduino IoT Weather Station to the roof at SparkFun HQ.
Have you ever wanted to create your own IoT weather station? This project demonstrates how to create a weather station monitored with Arduino Cloud.
Project Considerations
Before proceeding with this project, there are many considerations to factor into your design choices. The following are a few examples, but not the extent of the factors that may affect your weather station.
- Soil Moisture
- In this project, we will not be incorporating the soil moisture sensor because our weather station will be mounted to the roof of the building. However, users will need to account for the amount of cable required for their setup and the exposure of the electrical components on the sensor.
- Humidity
- While it would be ideal to house the electronics in a completely waterproof enclosure, this will greatly affect the readings from the sensors. With proper airflow, the humidity sensor will provide correct readings.
- UV Light
- The enclosure should allow UV light to pass through; otherwise, the UV sensor will not be able to make measurements of the sunlight. In addition, users should consider how the light will hit the sensor throughout the day.
- Temperature
- Similar to how a greenhouse traps the Sun's energy inside to keep plants warm, an enclosure can also be susceptible to the greenhouse effect. In this case, the inside of the enclosure would heat up beyond the ambient air temperature and provide inaccurate readings.
- Environmental Factors
- Weather and electronics usually don't mix well with each other.
- Dust and water are a recipe for disaster when it comes to electronics. You may want to consider a conformal coating to protect the board from the elements if you are not using a sealed enclosure.
- When mounting your weather station outside, consider elements such as high wind, lightning, etc.
- The pole in the weather meter kit is metal and could act as a lightning rod, where a lightning strike could arc and follow the power cable from the weather station.
- With high winds, your innocent weather station may become a weapon of destruction if it gets loose.
- For enclosures that aren't completely sealed, the combination of high wind and rain could allow water to penetrate the enclosure.
- Even if your enclosure is completely sealed, you may want to have a desiccant bag to prevent condensation from forming. (As the enclosure is already sealed, the humidity readings will not be relevant.)
- Weather and electronics usually don't mix well with each other.
Materials
When it comes to measuring weather accurately, some specialized sensors are required. Luckily, the SparkFun Arduino IoT Weather Station includes almost everything required to build your weather monitor station.
- Users will need to purchase a compatible enclosure, mounting hardware, and power accessories separately. (Most of these items can be found at your local hardware store.)
Hardware Setup
Weather Meter Kit
Users will need to assemble the weather meter kit. If you are unfamiliar with the weather meter kit, check out our assembly guide:
Weather Meter Hookup Guide
Enclosure
The enclosure houses the electronics and protect them from the elements. We recommend that users avoid utilizing a metal enclosure; the metal can potentially cause interference in the WiFi signal to the ESP32 microcontroller.
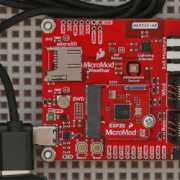
- Attach the MicroMod ESP32 Processor board to the Weather Carrier board.
- Program the board (see Software Instructions section below)
Note: We recommend that users program their board and test their sensors and WiFi connection in a controlled setting before mounting any outside hardware. This will facilitate troubleshooting and isolate issues related to the enclosure, mounting hardware, mounting location, and/or WiFi connection.
- Program the board (see Software Instructions section below)
- Mount carrier board to the enclosure
- Drill hole(s) for wiring
MicroMod ESP32 Processor Board Hookup Guide
MicroMod Weather Carrier Board Hookup Guide
Mounting the Weather Station
- Mount the weather meter kit
Note: When mounting the weather meter kit, orient the wind vane sensor to the appropriate cardinal directions. Otherwise, users should recalibrate the sensor's ADC values in the Arduino sketch. - Mount the enclosure
- Connect the power and RJ45 sensor cables to the weather carrier board
Software Instructions
The software and project instructions can be found on the Arduino Project Hub: Weather Station with Arduino Cloud. Users can also download the code from the GitHub repository for the project.
Note: The Arduino Project Hub post does a great job of summarizing the information needed to set up your device and dashboard. However, if you are still familiar with the Arduino Cloud platform and would like to see their full instructions on creating a device, configuring a thing, and dashboard, please check out their getting started tutorial.
Getting Started with Arduino Cloud
August 30, 2023
Note: In the Project Hub post, there is a table of variables from the Arduino sketch. The Starting Plan column indicates which Arduino Cloud plan(s) will allow users to access those variables (see the Note below).

Arduino Cloud plans and the variables available in the Arduino sketch. (Click to enlarge)
Note: Depending on your Arduino Cloud subscription, you have a limit on the number of maximum variables that are available to configure. (Check the full list of supported features for each plan.)
Maximum number of variables per plan:
- Free: 5
- Entry: 10
- Maker and Maker+: Unlimited
For example, you only have to create _uvIndex_ variable if you have an Entry or superior plan ( Entry, Maker, or Maker +).
Enjoy!!!
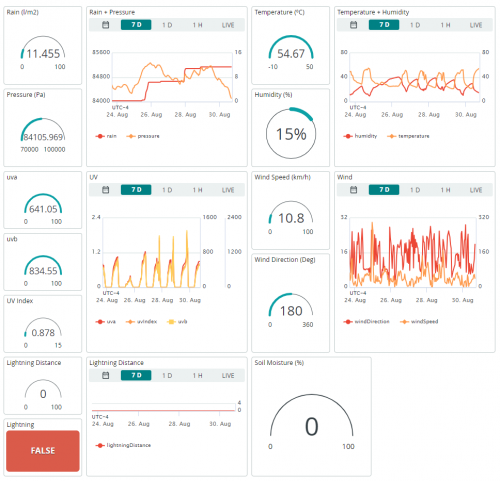
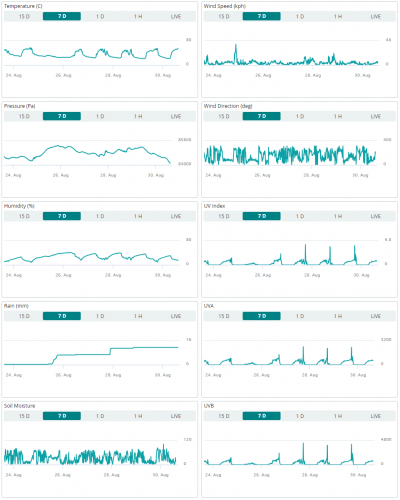
After the hardware setup and programming was done, we set up our Arduino Cloud account and created our dashboard. The new weather station was then mounted on the roof of the SparkFun HQ building. Here is a look at the data from our new weather station on the Arduino Cloud dashboard:


