XRP: Assembly & Software Starter Guide Video

Learn how to assemble and set up the software on your new XRP Kit with this easy-to-follow video!
If you have been looking to pick up or have just got your hands on the Experiential Robotics (XRP) Kit and you're ready to assemble it for the first time, we have a guide for you! In the video below we will go over the assembly process for for putting the whole kit together, as well as how to set up the programming environment to test and verify that everything has been assembled correctly!
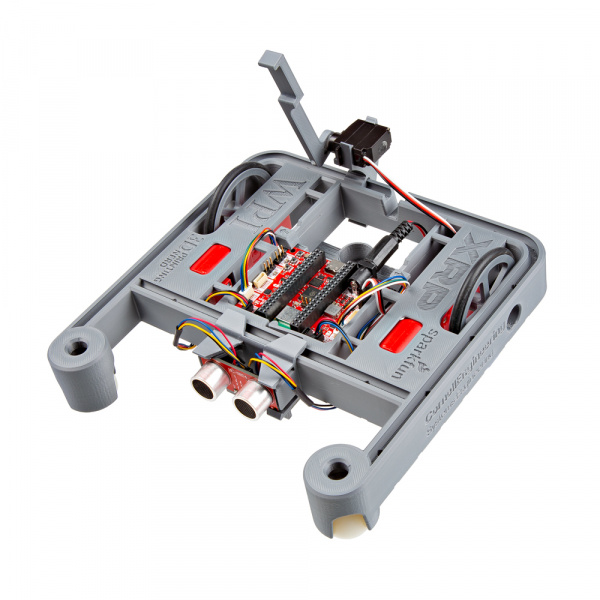
In case you didn't know, the Experiential Robotics Platform (XRP) is a hands-on, comprehensive robotics platform. It includes everything needed to build and program a robot to perform beginner through advanced tasks - building the foundation for innovative thinking, science, engineering, and problem-solving.
$119.95
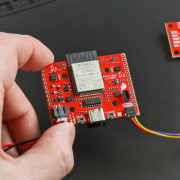
This kit is the XRP's hardware pillar. The SparkFun XRP Controller is significantly improved over the Beta XRP Controller! It features a Raspberry Pi® RP2350B dual-core processor; 16MB of flash and 8MB of PSRAM; low-power accelerometer + gyroscope 6-DoF IMU (LSM6DSOX from STMicroelectronics®); two Qwiic® connectors for easy integration of sensors and accessories; two dual-channel motor drivers for four motors total; four servo headers; a user button; a full-color RGB LED; 0.1in. headers for electrical expansion possibilities, and more. Wireless connectivity is available via a Raspberry Pi® RM2 radio module, enabling 2.4GHz WiFi and Bluetooth for remote control and IoT projects.
The plastics and chassis have also been significantly enhanced over the Beta XRP! Improved snap-fit components and optimized 3D-printing compatibility make assembling the XRP remarkably easier. Thanks to improved durability, a redesigned battery holder, and versatile mounting options, the XRP has also become more robust and user-friendly.

