Enginursday: Adventures in Building My Own Workbench
Designs for a custom, DIY electronics workbench, and some lessons I learned in the process.
I wouldn't call woodworking my forte by any stretch of the imagination. But, like any good DIYer, I felt the need to try it (at least once).
When I moved to Boulder back in August, I did not take much furniture with me. I had a basic (read: cheap) desk that I used for many years prior to my move, and sadly, I had to leave it behind. I disassembled it and left it in the "free furniture-slash-disposal" pile in my apartment complex (I noticed that it had vanished before trash collection day, so I assume that someone in Virginia is now happily using a perfectly good, secondhand desk).
Part of the decision to rid myself of my well-used desk was the burning desire to upgrade (naturally). Most desks are designed to satisfy basic computing, reading, and writing needs. You need to spend extra cash to get something that goes beyond those needs, such as a drafting table or an engineering workbench. Being an engineer, I opted for the latter. Upon my initial search, I was shocked by how expensive decent electronics workbenches could be. Name brand workbenches like Lista and Edsal could easily run $1000+ (as a side note, if you live near a university, you might be able to procure their old workbenches for free or cheap if they are in the process of upgrading).
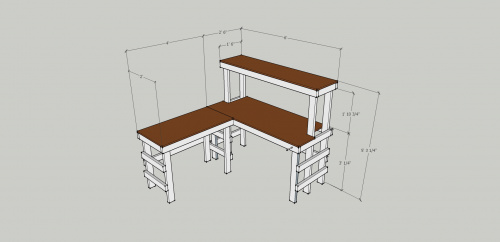
I thought I could do better for cheaper. So, I set out to design a workbench that met my needs. I started researching what others had done, and they ranged from the simple to the elaborate. I stumbled upon plans for a "$50 Workbench" and used it as a starting place for my design, which I created in Sketchup.
Because I was designing the desk to be primarily used for electronics work, I had a number of requirements:
- Usable while standing
- One area for the computer and another for soldering
- At least one upper shelf
- At least one shelf must be 18 inches deep to hold electronics equipment (e.g. oscilloscope)
- 24-inch monitor must fit under hutch
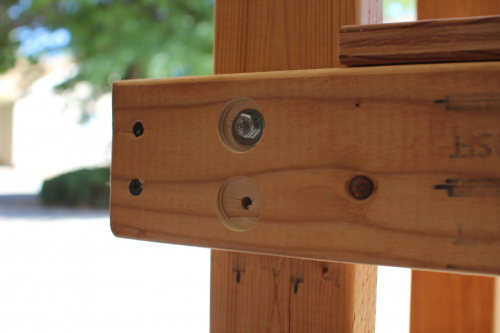
- Bolted (not screwed) together so I can disassemble and re-assemble the whole desk
- Sturdy enough so as not to shake while typing or soldering
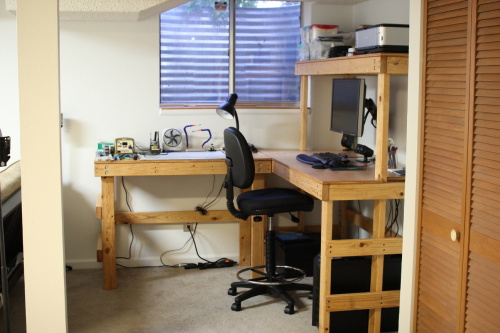
As a result, I modified the workbench design from The Family Handyman article to suit my needs. I put the desk top at kitchen counter top height (about 36 inches) and ensured ample space under the hutch (about 23 inches) for the monitor. The legs would be screwed together as subassemblies and bolted to the top sections. This modular approach would allow for easy disassembly and re-assembly (so I can take the desk with me when I move out of my current apartment).
Additionally, I wanted to stain and seal the desk (completely optional, but it made for a much nicer finish). So, I purchased sealer, polyurethane, sandpaper, steel wool, a nice brush, and some tarps as well. In the end, everything cost around $200. You can save some money if you don't opt for the staining and sealing.
My girlfriend visited for the weekend, so I was more than happy to have the extra help. We had Home Depot make the necessary cuts of wood out of 2x4s and birch plywood. Once home, all the pieces were sanded to remove any burrs and round out the edges. After, the pieces were stained with a "pecan" stain to give the wood a warmer, richer color.
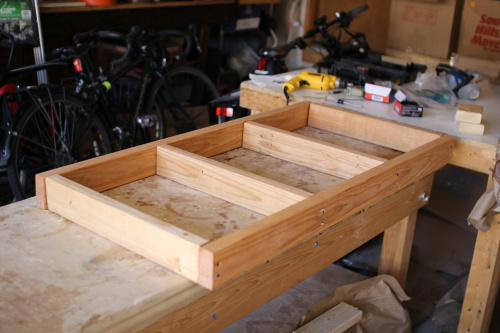
We assembled the legs and top pieces separately. Each of the subassemblies were held together with wood screws.
I spent the next week sealing the project. I applied only one coat of sealer to the legs, but the tops got two coats and copious sanding. While the desk looks like 2x4s screwed together (because, well, it is), the tops were fairly smooth (more sealing and sanding would make for an even smoother finish).
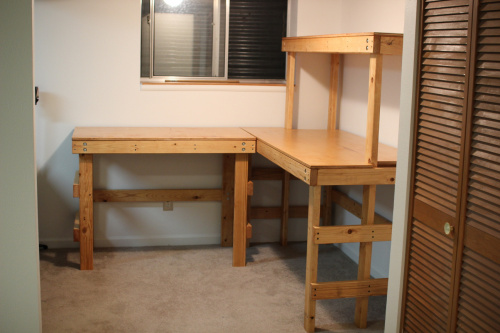
The whole thing was assembled in a nook in my apartment...
...and furnished with my stuff.
I have since added drawers underneath the soldering desk to house tools and some drawers on the desk to hold electronic components. Eventually, I would like to add an oscilloscope and perhaps a second monitor.
My question to those of you with more experience: I noticed that because it is a tall desk, there is a fair amount of wobble. The desk is braced in a corner for now, but I would like to make it more stable on its own. Can you suggest any good ways to make it more stable? Use 4x4s? Put diagonal beams up the sides? I'm open to any ideas!
My Sketchup plans can be found here.
When I make changes, I will update my GitHub repository.

