Internet of Tools for your Internet of Things: Part 1
There are tons of IoT services out there. Here are just a few who are supporting the maker community.
With the growing number of shiny new IoT platforms and APIs, starting your next IoT project is becoming easier and faster than ever. With all of these new services popping up, discerning the one that's the right fit for your project can be a little overwhelming. Certain platforms will cater more to certain languages and experience levels, and as a maker, I decided to create a series of blog posts that highlight what resources, software, and services are out there, so you can find the right match for your all-night, caffeine-augmented creation. Here is a quick run-down of a few services out there!
Temboo
When they say "Code the Internet of Everything"...they really mean everything
Temboo has been around for a few years now, and they've built up over 2000 things you can do from their collection of libraries to support and augment your projects.
Compared to similiar IoT software out there, Temboo is one of the more beginner-friendly platforms you can use to get started on your IoT project. This is a great option to look into if you don't want to spend most of your time writing code to interact with the service, and allows you to focus on rapid prototyping. Temboo has a ton of documentation, and can even help you along with their automagic code generation, as well as being visually easy to follow.
Highlights
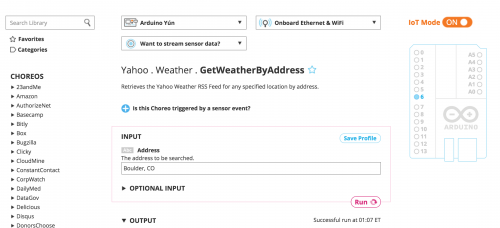
- 2000+ easy to use Choreos and examples ranging from sending temperature readings to your Gmail, to getting weather information, to better automate when to turn on your Arduino-controlled water sprinklers.
- Auto-generating all the code for your project. All you have to do is upload the code in Arduino IDE to start seeing your project working.
- Free options, and free upgrades for educators and students.
- Data Streaming with Google’s BigQuery or Microsoft’s Power BI cloud storage.
- Been around for quite awhile now, so tons of examples found online.
Getting Started - Beginner Friendly with lots of possibilities
| Hardware Documentation For Popular Boards | |||||||||||
|---|---|---|---|---|---|---|---|---|---|---|---|
 |

| ||||||||||
| Arduino Quickstart | TI CC3200 LaunchPad Quickstart | ||||||||||
Parse
Facebook is joining in the IoT and Open Source Hardware Party
Most of the time when you think of Facebook, the image of your timeline being taken over by Buzzfeed videos of cats comes to mind. However, in the last year Facebook has started to acquire and invest in interesting hardware companies like Ascenta, a company specializing in High-altitude UAVs, and the well known Kickstarter success story that helped to make virtual reality consumer-ready and affordable, Oculus VR.
Facebook announced at their F8 developer conference that Parse will have support for IoT connectivity. Included in that announcement, the mention of new SDKs and support for [open source hardware]((https://www.parse.com/docs/arduino_guide) to make connecting your devices and apps easier caught my attention.
Ultimately, Parse enables you to easily connect your devices and applications to the cloud, and exposes a plethora of polished features you can leverage in your project. Additionally, their pricing model for small projects is very attractive - it's free.
Highlights
- Time to create a connected 'blink' example is fast and well documented.
- Push notifications
- With a free 30 requests per second and plenty of storage to boot, it's a great zero-cost option for a lot of projects.
- Easy access to the cloud and data storage
- Intuitive and well polished interface
Getting Started Resources
| Hardware Documentation For Popular Boards | |||||||||||
|---|---|---|---|---|---|---|---|---|---|---|---|
 |
 |

| |||||||||
| Raspberry Pi Quickstart | Arduino Yún Quickstart | TI CC3200 LaunchPad Quickstart | |||||||||
Parse is surprisingly fast to get started with. For a simple home IoT project, you can connect a PowerSwitch Tail II to an Arduino Yún and a lamp. Following their Arduino Yun Quickstart, in 30-45 minutes, you can unbox the Arduino Yún, hookup your hardware, install the SDK, and control a lamp with a button on a website with ease.
Step 1: Setup your Arduino Yún
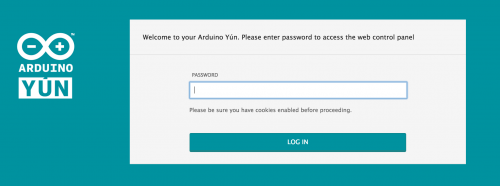
To get started, follow Arduino's guide to configure your Arduino Yún WiFi. For this example, connect to an existing WiFi network through a web browser using Arduino's web control panel.
Step 2: Install the SDK
The Arduino Yún Quickstart goes step-by-step through downloading the Parse Arduino Starter Project, uploading the Parse Linux runtime package to the Arduino Yún, importing the Bridge and Parse libraries, and uploading an Arduino sketch – all in a couple minutes' time!
After going through the initial setup, upload the push notification example sketch below. You can see it doesn't take much code to do a simple push notification.
#include <Parse.h>
#include <Bridge.h>

/***** Quickstart of Parse Arduino Yún SDK *****/
// https://www.parse.com/apps/quickstart#embedded/arduinoyun

ParseClient client;

void setup() {

  // Initialize digital pin 13 as an output.
pinMode(13, OUTPUT);

// Initialize Bridge
Bridge.begin();

// Initialize Serial
Serial.begin(9600);

Serial.println("Parse Starter Project");

// Initialize Parse
client.begin("RZ48ULFW3DiVJ9JVt4ZS7MLptWwLvS3S90gxTZLn", "cs30eCx4uq51rFkwEsnMLaXhvenXLWA38aJnvKKx");

// Start push service
client.startPushService();
Serial.print("Push Installation ID:");
Serial.println(client.getInstallationId());

}

void loop() {

  // Check if there is a new push
// A push with message {"alert":"A test push from Parse!"}
// will turn on LED for 3 seconds
if (client.pushAvailable()) {
    ParsePush push = client.nextPush();

    String message = push.getJSONBody();
    Serial.print("New push message size: ");
    Serial.println(message.length());
    Serial.print("New push message content: ");
    Serial.println(message);

    String command = push.getString("alert");
    if (command == "A test push from Parse!") {
       digitalWrite(13, HIGH); // turn on LED
       delay(3000);  // wait 3 seconds
       digitalWrite(13, LOW); // turn off LED
    }
    // NOTE: ensure to close current push message
    // otherwise next push won't be available
    push.close();
}

}
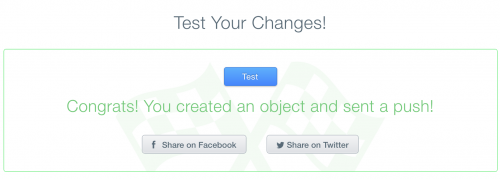
After uploading the sketch, press the "Test Your Changes" button to turn on the on-board LED (or lamp if you have the PowerSwitch Tail connected to digital pin 13) for three seconds.
Why Check Out Parse? Who is this for?
Parse is worth checking out if you want to easily enable connectivity to your device from a central platform, and still have a large assortment of features to assist in growing your application. Check out their guide to create an Amazon's Dash button for a quick example of what you can do.
Golgi
The Golgi team reached out to us to share that they released documentation and support for Arduino or Intel hardware to work with Golgi. Golgi is an IoT cloud service that simplifies connectivity and data transport for mobile apps. Since Golgi is starting to provide support for the maker community, I asked Brian Kelly, the CTO and co-founder, some questions to catch us up on what Golgi is and some of its features.
PC: What makes Golgi great to use when making projects that need to connect to the cloud?
BK: Golgi simplifies and automates the code needed to connect and control your devices. In addition it makes it easy to implement a full suite of interactions to support whatever features or functionality the developer is trying to realize. Whether you want to control or interact with your device from your mobile, a web browser or from a server somewhere, Golgi takes care of what can be quite tricky connectivity scenarios, leaving you free to focus on the implementation of your desired functionality and features.
PC: Security is a hot topic in the IoT world. What are some features Golgi has that makes sure your data is safe?
BK: Golgi provides hooks in all our runtimes to allow the developer to encrypt and decrypt data as it leaves and arrives at their endpoint (be that the device itself or a browser, mobile application or server side code). These hooks make it possible for the developer to implement full end-to-end encryption turning their data payload into an opaque blob while it is in transit between the endpoints. We provide some example implementations on our GitHub page, but really it is about allowing the developer to choose what level of encryption is appropriate for their use-case, from none at all, through a simple symmetric shared secret approach, to full PKI encryption, the developer has the choice.
PC: There are quite a few cloud services now that are aiming for makers. Why did Golgi decide to offer support for hardware and makers, for example Edison and Arduino?
BK: While there are several companies out there offering backend-as-a-service style solutions for storing data generated by devices, and some others providing low level connectivity, we didn't see any solution providing the sort of leverage that Golgi provides, we solve many complex problems for the developer, in areas where they probably aren't that interested in becoming experts in, freeing them to create exciting things with their devices in the shortest time possible timeframe.
**PC: It is exciting to see more and more companies offering support for the makers community. What type of applications can you see being made with Golgi by the community? **
BK: If a solution requires connectivity of any sort to control, configure or interact with it, we believe Golgi can be an extremely valuable tool in the developer's toolbox. It is hard to single out any particular type of application. As long as it requires any kind of connectivity, Golgi can help out. Having said that, some of the problems we have solved in the mobile connectivity area make us an ideal choice for applications that need to be controlled by a mobile device (a phone or a tablet) especially if there is some kind of alerting or monitoring involved where the solution needs to alert the user to some new or changed condition.
**PC: What are some examples of projects you have done with Golgi? **
BK: We have used Golgi in keyless entry systems, security monitoring solutions, and data gathering solutions (temperature & humidity sensors), but as I pointed out above, Golgi can be used in pretty much any solution that has a remote connectivity piece.
PC: There are a lot of makers who want to work with mobile. How easy is it to get started if you haven't done any mobile development?
BK: We have a range of approaches that make it easy for developers to use Golgi from a mobile device. The simplest solution can actually be a web page that is accessed from the browser on the device, an embedded web application, through to native applications (for Android and iOS) that can interact with the device and all the way to full background processing where the device needs to alert the user to some change and needs to wake up the application in the background. All of this is possible and simplified by using Golgi as part of the solution.
