Enginursday: Digital Handpan
Make your own digital handpan drum using the Teensy Audio Shield and the Teensy's built-in capacitive touch inputs.
About a year ago, a friend of mine asked me a question that changed my view of percussive instruments forever. She asked, "Have you ever heard of spacedrum?" Being a drummer, I would have remembered if I had ever heard of such an instrument. I had not. She then proceeded to show me this video. I was immediately captivated and had to know more about this so-called spacedrum.
After some research, I discovered that this drum is a relatively new invention. It goes by many names, but the inventors call it a Hang. Other names include Handpan or the redundant misnomer, Hang Drum. Originating in Switzerland, the Hang was developed in the early 2000s. It typically includes eight notes, usually seven notes harmonically tuned around a central, deeper note.
After watching numerous Handpan YouTube videos, I decided that I had to have one of these instruments. However, my dreams of owning my own Handpan were crushed when I discovered that not only are these drums expensive (a couple thousand dollars is not an uncommon price), but they are also incredibly hard to come by, as there are only a handful of makers in the world. The manufacturers even have to hold lotteries or keep waiting lists in many instances.
Remaining undeterred, I kept searching for a cheaper solution. This comparison video of other steel-bodied drums helped point me in the right direction. In it, a similar but different drum is shown: the steel tongue drum. More searching led me to the HAPI Drum website, where I purchased my first HAPI Drum Mini. I have been a satisfied customer ever since.
After spending many months with my steel tongue drum, I wanted to explore the possibility of making a digital version. More research led me to the Oval website. I found the design and approach ideal, but the price tag and preorder status were enough to convince me that I could make my own.
I knew I wanted capacitive touch as the main interface, and I knew the Teensy had pins that were capable of touch sense without any additional hardware. That, coupled with the fact that numerous engineers around SparkFun have been playing with the Teensy Audio Shield, resulted in the Teensy 3.2 being the perfect platform for my project.
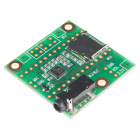
Teensy Audio Board
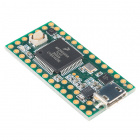
DEV-12767Teensy 3.2
DEV-13736Check out the video below for a demonstration and more details about the digital Handpan.
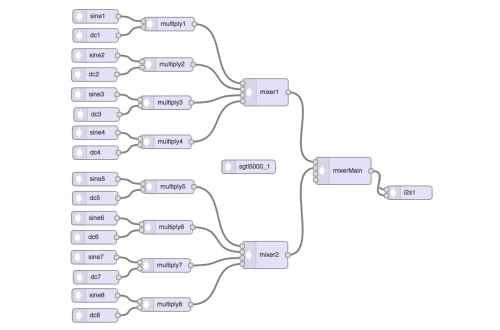
The Teensy, coupled with the Audio Shield, produces polyphonic notes when any number of the eight capacitive touch pads are touched, replicating the bell-like sounds of a Handpan. Using the Teensy Audio Shield as well as the Teensy Audio System Design Tool made the audio portion a breeze. You can even import the Audio System Design Tool code from my sketch to start with the audio system I used, and modify it for your own needs.
All the code for this project can be found in the Digital Handpan GitHub Repository:
Inside the code, you'll find all the info pertaining to which pins were used as Touch Sense pins and which were used for the buttons and knobs. The comments found in the sketch should contain all other information regarding how the digital Handpan works. Information on how to use the Teesny Audio Shield in conjunction with the Audio library can be found here.
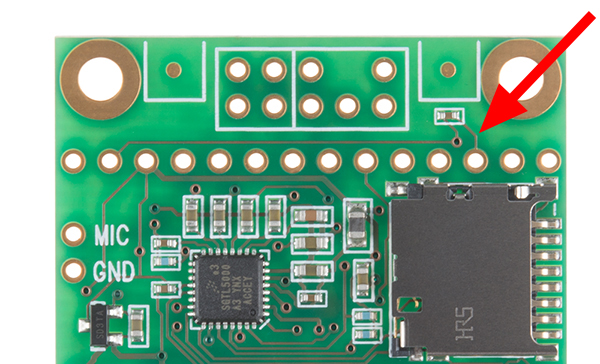
I did have to make one major modification to the Audio Shield for this project. The Teensy 3.2 has 12 pins capable of Touch Sense. Of those 12, five are in use by the Teensy Audio Shield. However, one (pin 15) was being used for the volume knob on the Audio Shield. Since I was using a potentiometer on a separate analog pin that did not have touch sense to control the volume, I was able to cut the trace to the Audio Board's built-in volume knob footprint and use that pin as my eighth capacitive touch pad.
The next step is to find a cool, one-of-a-kind body in which to build the second iteration of the project. Luckily, Halloween has just ended, and the thrift stores will be brimming with odd-shaped items. We'll cover the next iteration of the Digital Handpan in a later post. Thanks for reading!
Comments? Concerns? Suggestions? Please leave them below.
