Pasting and Reflowing Homebrew PCBs
See the difference solder paste stencils make in homebrew PCB assembly, and we test out milled PCBs in the reflow oven.
When building a proof of concept PCB, it's both exciting and difficult to wait for all the bits and pieces to arrive. Impatience lead to our first prototype for the MLX90393 magnetometer being built by hand. Though the prototype worked, hand soldering is far from an efficient way to build rapidly.
For our second proof of concept breakout, the CCS811, the stencil arrived in time to stave off the urge to build by hand again.
With a stencil in hand and milled PCBs to assemble, it occurred to us that we had not sent a milled PCB through our reflow oven yet. It just so happened we had a few failed PCB attempts on the mill that served as perfect guinea pigs to send through the oven.
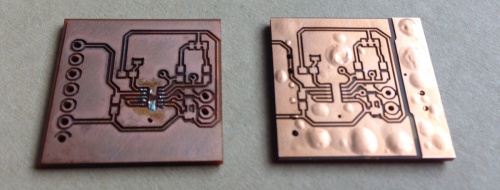
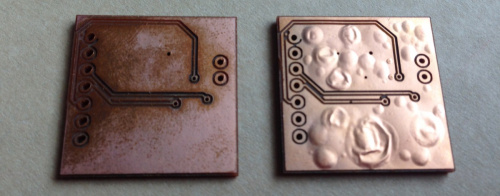
The first test board went through the oven directly on the grates. As you'll see in the images below, this caused the copper to bubble up and separate from the fiberglass. Not only was this unsightly but it also jeopardized the functional integrity of the board.
The second test board went through the oven on a scrap piece of carrier board (plain FR4 boards). As you can see, the board came out slightly more discolored than the first, however it was in much better shape with little to no bubbling or warping on the copper.
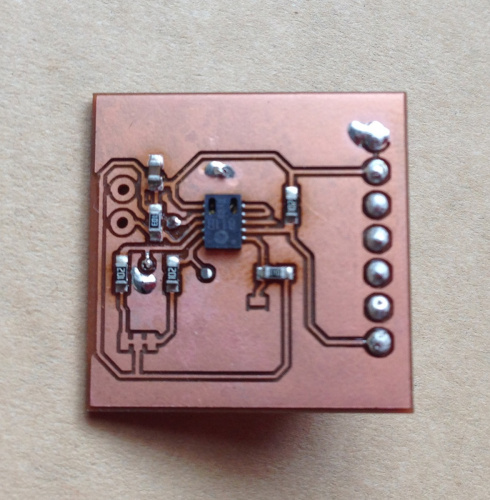
With the oven test complete, it was time to paste, build, and reflow our prototype for the CCS811. The paste job turned out beautifully. Parts were placed by hand, and two boards were sent through the oven on a carrier board. To our delight, both boards turned out great!
When you have the time and patience to wait for your stencil, it makes a world of difference.
