IoTuesday: Valentine's Box of Talk-lates
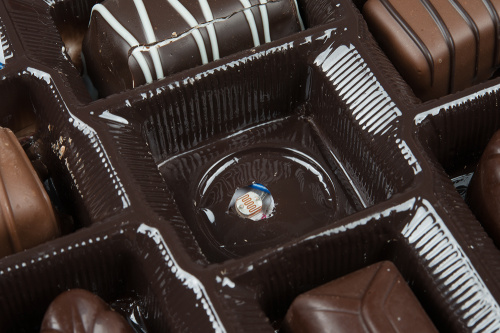
This box of chocolates will send your Valentine sweet nothings via text message as they eat.
It’s Valentine’s Day, and we know you are ready to pull out all the stops to impress that special someone. Finding the perfectly sweet and personalized gift can be a challenge and outright anxiety inducing. Fret no more! This box of chocolates will send your Valentine sweet nothings via text message as they eat.
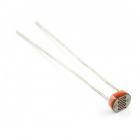
A hidden photocell underneath the tray of chocolates triggers the IFTTT protocol to send a text message when the photocell is exposed to light. Each time your Valentine eats a chocolate, they get another text.
You can build your own texting box of chocolates in no time! In addition to a box of chocolates, you will need:
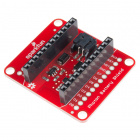
SparkFun Photon Battery Shield
DEV-13626Resistor 1K Ohm 1/4th Watt PTH - 20 pack
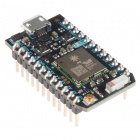
COM-13760Particle Photon (Headers)
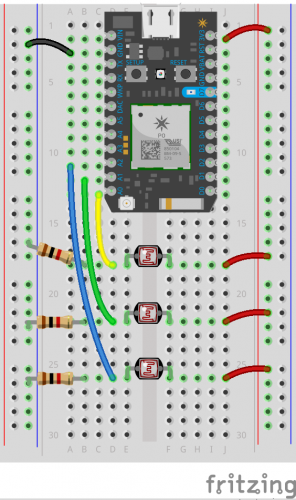
WRL-13774The following diagram illustrates the circuit.
If it is your first time working with a Particle Photon, visit the Particle docs for detailed instructions on board setup and connecting to WiFi.
Once your board is set up, visit the online Particle IDE and sign into your account. Copy and paste the following code into the text editor and flash it onto your Particle Photon device.
//Box of Talk-lates by Melissa Felderman for SparkFun Electronics


//declare analog pins connected to photocells
int photocell_0 = A0;
int photocell_1 = A1;
int photocell_2 = A2;

//adeclare variable for photocell values
int state_0;
int state_1;
int state_2;

//declare LED pin - used for debugging
int ledPin = D7;

//booleans used to determine if ifttt trigger has been sent. These will ensure only one text is sent, and not 100 or more in a row.
bool sent_0 = false;
bool sent_1 = false;
bool sent_2 = false;

void setup() {
   //declare photocell pins as input
    pinMode(photocell_0, INPUT);
    pinMode(photocell_1, INPUT);
    pinMode(photocell_2, INPUT);

    //declare LED pin as output
    pinMode(ledPin, OUTPUT);


}

void loop() {
    //assign photocell values to variabels
    state_0 = analogRead(photocell_0);
    state_1 = analogRead(photocell_1);
    state_2 = analogRead(photocell_2);


    if (state_0 > 2000 && sent_0 == false){ //if photocell_0 is exposed to light and trigger has not yet been sent
        digitalWrite(ledPin, HIGH); //turn LED on - use for debugging
        Particle.publish("photoState_0","light_0",60,PRIVATE); //send trigger to ifttt
        sent_0 = true; //change boolean to true, ensures that tigger will only be sent one time.
       // delay(1000);
        digitalWrite(ledPin, LOW); //turn LED off
    }


    if (state_1 > 200 && sent_1 == false){
        digitalWrite(ledPin, HIGH);
        Particle.publish("photoState_1","light_1",60,PRIVATE);
        sent_1 = true;
      // delay(1000);
        digitalWrite(ledPin, LOW);
    }


    if (state_1 > 2000 && sent_2 == false){
        digitalWrite(ledPin, HIGH);
        Particle.publish("photoState_2","light_2",60,PRIVATE);
        sent_2 = true;
      //  delay(1000);
        digitalWrite(ledPin, LOW);
    }

}
Now head over to IFTTT.com and either log in or create a new account. For each photocell in your box, you will need to build an individual applet. To do that head over to ‘My Applets’ in the menu bar and select the ‘New Applet’ button. Here you will need to set up two actions: one for ‘this’ and one for ‘that’ --- creating an ‘if this then that’ protocol. Let's start by selecting 'this'.
Find Particle's service by typing ‘Particle’ into the search bar, and then select ‘New event published’. I included three photocells in my example code. Remember, you need one applet per photocell. I will walk through setting up the first applet for photocell_0 or 'first photocell'. The second two follow the exact same process.
In order to fill in the required fields we need to reference our code, specifically the Particle.publish(); command.
 //first photocell
        if (state_0 > 2000 && sent_0 == false){ //if photocell_0 is exposed to light and trigger has not yet been sent
            digitalWrite(ledPin, HIGH); //turn LED on - use for debugging
            Particle.publish("photoState_0","light_0",60,PRIVATE); //send trigger to ifttt
            sent_0 = true; //change boolean to true, ensures that tigger will only be sent one time.
           // delay(1000);
            digitalWrite(ledPin, LOW); //turn LED off
        }
In this instance, ‘photoState_0’ is the ‘Event Name’ and ‘light_0’ the ‘Event Contents’. Fill out these fields respectively in IFTTT and then under ‘Device Name or ID’ find the name of the Particle Photon Device you are using, select it and hit 'Create Trigger'.
Now it’s time to set up ‘that’. Search for and select the SMS service. In the ‘Message’ field add your personalized message and select ‘Create action’ and then ‘Finish’. Repeat this exact process two more times updating the ‘Event Name’ and ‘Event Contents’ with the respective photocell data.
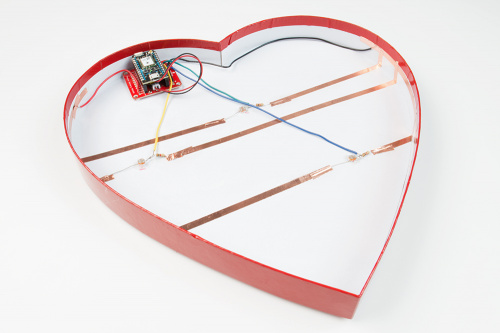
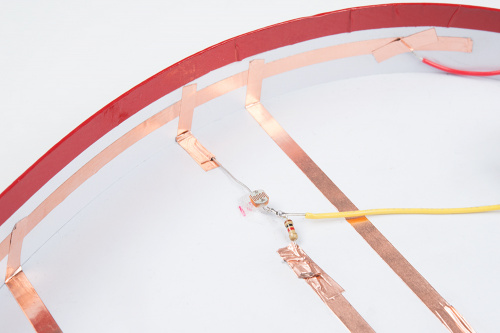
Finally, you will need to put it all together. Use an X-ACTO knife or other sharp object to cut out a small section for the tray to fit the Particle Photon and the SparkFun Photon Battery Shield. Then cut small holes under three random chocolates for the photocells and put the circuit together under the tray as shown in the images below:
Pop a LiPo battery into the shield and then place the tray of chocolates back into the box. Now find your Valentine and impress the pants off them!
What Valentine's Day projects have you made? Share with us in the comments below!
