Underlit Crystal Display
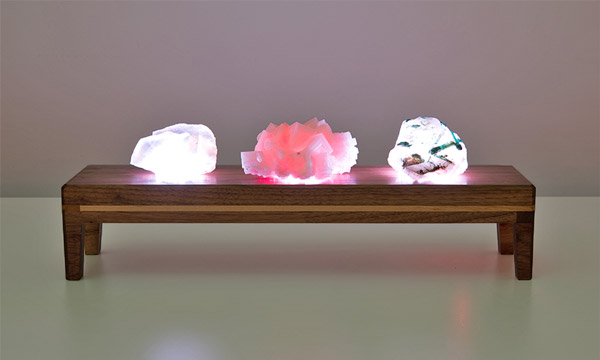
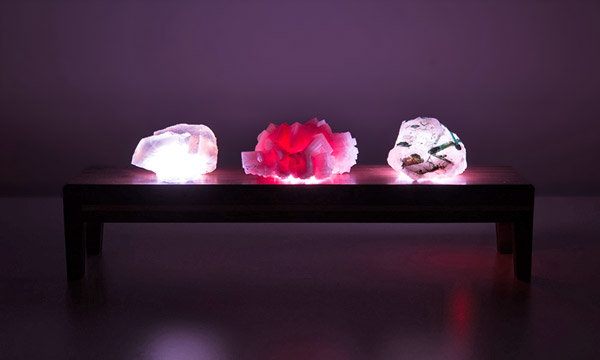
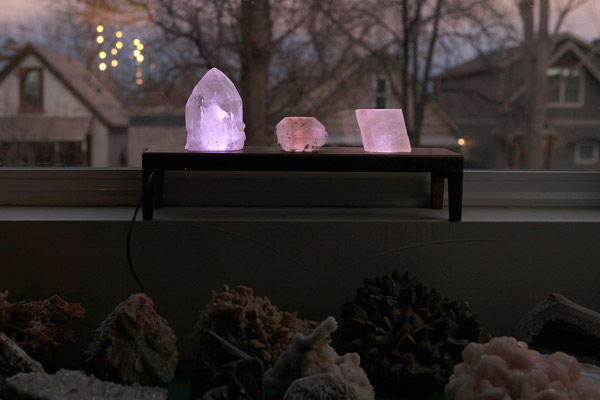
Are you crystal, gem or mineral collector? Display them in style with an underlit display.
For longer than I've worked at SparkFun, there has been a holiday tradition with our marketing team – we call it Secrete Santa. Yes...secrete. Long story short, around a decade or so ago a previous employee misspelled secret, and it's stuck every since. Anyway, Secrete Santa isn't your normal find something you want to get rid of and pass it along gift-giving event. Secrete Santa is more of a competition of who can give the best gift. If you can make a thoughtful enough gift that the receiver sheds a tear, it's a win. This year I ended up drawing the name of a certain coworker who's very into collecting crystals, minerals and the like. I decided to make her a display stand where she could beautifully display and light up her specimens with hidden LEDs.
The build
If you have seen my previous posts (DIY Sunrise Alarm or Smart Backlit Mountain Scene), you know that I enjoy mixing woodworking with what little skills I have with electronics. As long as it looks good and functions how I intended, for me that is a complete project. I wanted to keep the display sleek and simple, so I used walnut with a small curly maple inlay. If you would like to see the dimensions of this, I've included this SketchUp file for those interested in building one themselves.
Let's face it, no one wants to see a bunch of electronic components as part of their home decor.
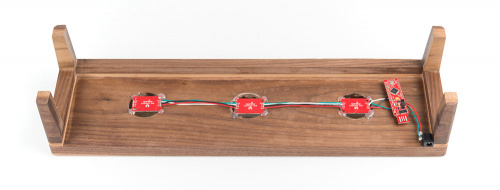
I cut three 1 1/4-inch holes with a forstner bit in the top to allow the light to come through. Let's face it, no one wants to see a bunch of electronic components as part of their home decor, so I had to be able to hide the electronics through the holes. This involved turning the stand upside down, sealing off the holes, and pouring around a quarter-inch of epoxy with gold crafting flakes mixed in. That was enough to hide the electronics and allow the light to pass through.
When it came to incorporating the electronics, I chose our SparkFun Lumenati 3x3 boards, a SparkFun RedStick, a barrel jack connector and a 5V wall adapter. The Lumenati boards are pretty straight forward to chain together, and the nine LEDs on each of them provided plenty of light. I simply hot glued the edges of the boards to the edges of the holes to hold them in place. The small form factor of the RedStick was perfect for this project, and the fact that it loads as an Arduino Uno was perfect for me as that's pretty much the only board I've had experience with (it's probably time to get outside my comfort zone).
The code
What I originally intended to do was to have the LEDs randomly and subtly fade up and down in brightness level. I found a few sketches out there that were close to what I was looking for, but frankly after I tested the different effects with a crystal of my own, I thought that my gift recipient would prefer a steady white. If I were to make another display for myself I might add a button to toggle through different colors and effects. That said, even having a microcontroller at all for this project might be overkill, but hey, I work for SparkFun, so it's cool.
#include "FastLED.h"

//Number of LEDs
#define NUM_LEDS 27

//Define our clock and data lines
#define DATA_PIN 2
#define CLOCK_PIN 4

//Create the LED array
CRGB leds[NUM_LEDS];

void setup() {

      delay(3000);
      //Tell FastLED what we're using. Note "BGR" where you might normally find "RGB".
      //This is just to rearrange the order to make all the colors work right.
      FastLED.addLeds(leds, NUM_LEDS).setCorrection(TypicalLEDStrip);

}

void loop()
{
   for(int i = 0; i < NUM_LEDS; i++ )
   {
   leds[i] = CRGB::White;  // Set Color HERE!!!
  }
  FastLED.show();

}
That gift giving moment
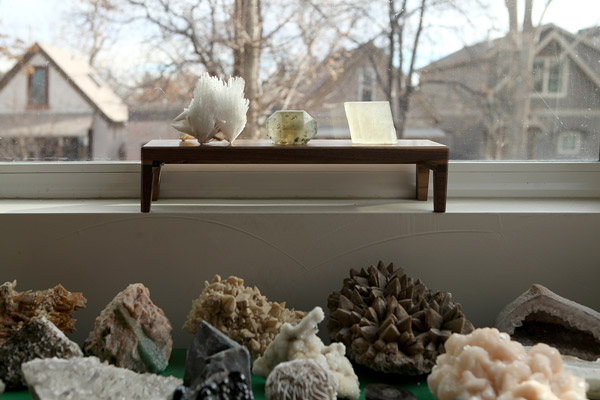
Our 2018 Secrete Santa gift giving extravaganza has come and gone and just may have been the best one yet. While I'm not sure if a tear was actually shed, I would still consider this gift a win as it is proudly illuminating minerals atop her collection. If memory serves me correctly, I believe she said, "I think I might cry." Dang, so close.
Interested in learning more about LEDs?
See our LED page for everything you need to know to start using these components in your project.
